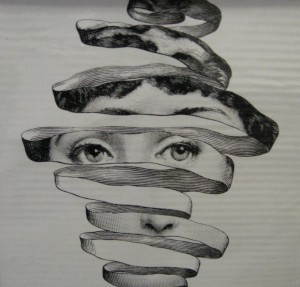
1. Theme and Variations No. 297 by Piero Fornasetti
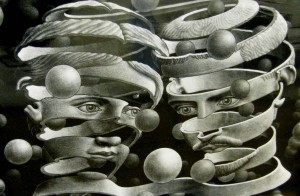
2. Bond of Union by M.C. Escher
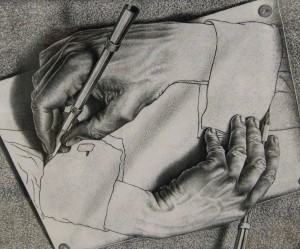
4. Drawing Hands by M.C. Escher
6. Vega-Kontosh by Victor Vasarely
8. Black and White by Victor Vasarely
Sample Projects:
Normally, our eyes collect images for our brain to interpret. An optical illusion happens when our eyes see something that the brain cannot figure out, so our brain conjures up its own information.
There are several ways to create optical illusions. The very simplest optical illusion, which every artist uses, is the illusion of distance, or three-dimensional DEPTH in a two-dimensional picture. FOREGROUND, MIDDLE GROUND, and BACKGROUND are three simple, yet magical, tools an artist uses to create this illusion they can be found in a plain and ordinary, two-dimensional Landscape. The illusion created is also called SPACE or PERSPECTIVE.
Our eyes can be automatically trained to know that objects found in the lowest area, or the bottom of a picture, are the nearest. This lower area is called foreground. Objects seen higher up in the picture, the center, fool our eyes into believing they are farther away than objects in the lower foreground. The center area of a picture is called the middle ground. The background is found near the top of a picture—the area that appears to be the farthest away. OVERLAP is another optical tool used by every artist, especially in a Landscape. Objects in the foreground usually overlap things behind them, giving the impression that they are closer to the viewer. All artists use these very simple techniques to magically fool a viewer’s eyes and create an illusion.
Illusions play tricks on our eyes and muddle our perception. The fun part is trying to figure out how illusions are created. Some optical illusions may depend on the light, the angle that you see them, or even the way they are drawn. Other optical illusions occur when different combinations of colors are used together. Optical illusions can be very interesting, confusing, or frustrating, but they are also especially fun.
This Packet is a good one for discussing, reviewing and teaching lessons on LINE, SHAPE, and especially COLOR. The distraction of the illusion component of the pictures is also a very fun way to open the door for some very important Basic EALRs lessons, review, discussions, and projects. Art projects are an effective tool for teaching and reviewing EALRs, as kids have fun without realizing what they are learning.
Make sure ALL 8 pictures are returned to the Packet Carrier after your Presentation is finished.
Project Ideas
Packet 18. Drawing Form & Shape
1. “Theme and Variations No. 297” by Piero Fornasetti. Lithograph.
About the Artist
Piero Fornasetti was born in Milan in 1913. Fornasetti was a graphic artist. He became a renowned designer by his late twenties and enjoyed this distinction until his death, in 1988.
About the Art
This picture is part of a series of paintings the artist created. It is the 297th variation.
What does “series” mean? It was one of many works created on the same subject with similar titles
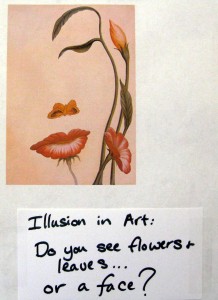
Fornasetti’s “Theme and Variations” series of pictures shows a variety of constant, mysterious, feminine faces appearing about 500 times throughout the various prints. In this series, the artist always pictures the face of the same woman in many different settings—a hot-air balloon, on building blocks, in the unraveling peel of a fruit. Using the same image so often suggests that the pretty face might have been a message or a symbol of femininity for the artist.
Nobody knew who she was. Her identity has remained a mystery, probably because Fornasetti liked puzzling people and making them think. Some have suggested that he took her image from a 19th-century French magazine. It might also be that her face belonged to someone the artist knew personally. Whatever the answer to this woman’s mysterious face, it is clear that Fornasetti liked her because she is displayed with both affection and humor, on the verge of mocking the viewer.
What type of MOOD does the picture create? Quiet, surprising, calm, still, strange, mysterious, funny?
Which visual element did the artist use the most to create this face? LINE
Compare this picture with Bond of Union, by M.C. Escher. The two heads in Escher’s picture unravel in much the same way to form the shapes of human heads. The Escher heads are symmetrical. This Fornasetti head is slightly misshapen.
Does this face have symmetrical BALANCE (the same on both sides)? This face is a little off balance—the nose is slightly to the right and so is the eyebrow.
Besides her neck and body, which parts of the girl’s anatomy are missing? Her mouth and ears
Project Idea
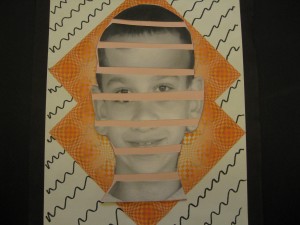
Find large pictures of faces in magazines. You might also take a close up digital picture of the teacher’s face, against a plain white background, and then print this in black and white. Cut face into several horizontal strips. Glue every other strip in place, with empty space between, to form an incomplete portrait. One picture will make a set of two incomplete portraits. Use a pencil to draw the missing sections of each face in each empty space. Glue both portraits on a larger paper to create a frame for the double portrait. Avon, Glamour and Fashion magazines are good sources for faces. Consider taking a digital picture of each child in the class a few days ahead and printing this in black and white to use for the project.
2. “Bond of Union” by M.C. Escher (1956)
About the Artist
The Dutch artist M.C. Escher has been called one of the greatest graphic artists of the twentieth century. In 1923, Escher went to live in Italy, where he traveled and became inspired by the Roman architecture for his drawings, lithographs and woodcuts. Shortly after arriving in Italy, he met Jetta Umiker, the woman he married a year later. Jetta also loved to draw and paint, although she had never had any formal art training.
In 1935, Escher and Jetta left Italy and, after a short stay in Switzerland, went back to Holland. It was in Holland that Escher began to create his greatest masterpieces.
About the Art
Escher created very few portraits and most of these were early in his career. In Holland, his art began to move away from directly copying nature towards his new more graphic-mathematical pictures. Escher created this double portrait shortly after he began changing his style and it was inspired by the intense love he had for his wife.
In this picture, Escher has created an interesting double portrait of illusional three-dimensional FORM using flat, two-dimensional SHAPE. At the same time, the portrait is a symbol of the loving and close relationship Escher and with his wife Jetta. The picture shows a broad band, without beginning or end, rising in the shape of spirals, forming two heads leaning slightly towards each other. The heads appear to be floating. Seen on the left is the head of Jetta, on the right is Escher himself. The features of the two faces look similar to each other.
Begin at one spot in this picture and trace the band that forms the two heads. The band has no beginning and no end to it. The heads are formed, connected and intertwined by the same band. This is what Escher had to say about this picture, “As a band without end, and their foreheads jointed together, they form a unity of two.” This is a representation of the way Escher felt about his marriage.
Two-dimensional SHAPES seem three-dimensional as they surround the hollow FORM of the heads. What three-dimensional FORM do the hollow shapes represent? The shaded circles represent SPHERES.
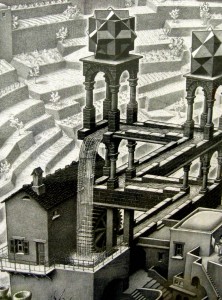
3. “Waterfall” by M.C. Escher (1961)
Look closely at the BACKGROUND. What do you see here? The background is a terraced garden landscape, with neat little rows of plants (vegetable garden?) on each level and several trees scattered around.
What do you see if the left corner FOREGROUND? A small garden overgrown with bizarre looking plants that resemble underwater type plants
In the center of this picture is a complex construction. Two towers rise with a geometric shape on the top of each. The SHAPES are called POLYHEDRONS and are drawn to look three-dimensional. Small houses or apartments are attached to this construction—one on the left and one on the right. The center MOVEMENT of the picture is the waterway, which falls onto and drives a waterwheel. Can you see the waterwheel? The water then follows a slightly downhill direction as it flows through the towers, and returns to the spot where it once again flows into the waterfall.
How did the water get back up to the top of the waterfall if it was flowing in a down hill direction?
In the British Journal of Psychology, in 1958, R. Penrose published a drawing of a three-dimensional structure called a tribar. A tribar looks like it is an object that we could build, yet it can only be drawn because, although the tree right angles are completely normal, they have been joined together in a false, spatially impossible way.
Escher discovered Penrose’s tribar and was inspired to create the lithograph of Waterfall. There are three tribars linked together in this picture. As our eyes follow along the waterway in the picture, the falling water gets us to finally realize the craziness of the picture. The corner points of the tower cubes are not connected correctly. This makes our eyes involuntarily see that the point farthest away is the one that is also the closest, and the highest tower as the one that is also the lowest. The waterfall in the drawing achieves what we consider to be impossible—perpetual motion, the water continues to travel around the waterway, fall, travel around again, and fall again, over and over.
We can only guess whether the man in the center FOREGROUND, looking up at the waterfall, is aware of the impossibility of the water’s motion in this picture. Were you aware of this impossible situation before it was pointed out?
The longer you look at the picture, the stranger it becomes. Escher had an encouraging motto: “He who wonders at something is aware of a wonder.”
What do you think Escher meant by that statement?
Can you figure out the way that the artist was able to fool our eyes with his drawing?
The picture has examples of all 5 of the basic LINE TYPES. Where can you find them in the picture? Vertical, Horizontal, Diagonal, Curved, Zig zag
What else is happening in the picture? A woman is standing on her roof hanging out clothes.
What type of TEXTURE did the artist include in this picture? Where did the artist create texture? How did the artist create the texture? How would you describe the texture? Lines in the water indicate rippling waves, roof (ask kids to describe it), hillside (again, ask kids to describe it), buildings, strange garden, POLYHEDRONS
Can you find PATTERN anywhere in this picture? There is pattern in the stair steps, the railings, the bricks lining the edges of the waterway, the leveled terraces, the rows of vegetation, the columns of the towers, the designs of the geometric polyhedrons, and the gate to the strange looking garden
Can you find RHYTHM anywhere in the picture? Rhythm is associated with Pattern. It is like the spacing of the beat of the music in a song. The railing has an ALTERNATING PATTERN, as well as the sides of the brick waterway. The TOP of the brick waterway has a REPEATING PATTERN, so do the stairways, and the many rows of vegetation on the hillside. The terraces and the trees have a RANDOM PATTERN because they are scattered different distances apart. Each of these three PATTERNS has a different RHYTHM as you follow the SPACING of the pattern.
Project Idea
- Use colored cut paper shapes (GEOMETRIC or FREEFORM) to create an abstract design demonstrating each of the three types of PATTERN discussed in the picture—alternating, repeating, and random. Demonstrate how to cut several of the same shapes at once by accordion folding the paper. Glue the pattern examples to three separate black pieces of paper and label them. Cut 9” x 12” pieces of black paper in half and give everyone three pieces. When the patterns are finished, glue them to a larger colored background so that the lesson becomes an abstract artwork. Challenge kids to go home and test their parents or older siblings to draw examples of each of the three patterns. Tell them not to let their parents see their art project until they get the chance to quiz them. Let kids know that many people can recognize these patterns once they see them, but many do not know what each pattern type is actually called. Tell them you can hardly wait to find out next month how many of them were able to teach their parents something new about PATTERN!
4. “Drawing Hands” by M.C. Escher (1948)
About the Artist
Murits Cornelis Escher did not like school, except for his two hours of art each week. Twice he had to repeat a grade in school. Escher was very smart, especially in math, but his problem was that he preferred to work on artwork instead of his schoolwork!
Escher’s father, an engineer (these guys are very good at math), thought that his son needed a good scientific education and training. Because he was very gifted artistically, his father decided that Escher should become an architect. At the School of Architecture and Decorative Arts, which his father chose for him, Escher’s architectural training did not last very long. It only took a few days to demonstrate that the young man’s talents were more in the direction of the decorative arts than the field of architecture. With the reluctant agreement of his father, young Maurits changed his studies to major in the graphic arts.
About the Art
Using cleverly distorted perspective, the artist communicates the idea that everything is continuously returning to its starting point, the same message he illustrated in Waterfall.
If a hand is drawing a hand and if, at the same time, this second hand is busy drawing the first hand also, and if all this is illustrated on a piece of paper tacked to a drawing board…and if the whole thing is then drawn again, we could describe it as a sort of super deception, or a tremendous trick.
The authentic act of drawing is itself actually a type of deception or a trick. The viewers are being persuaded that they are looking at a three-dimensional world (having height, width, and thickness), when the drawing paper is only two-dimensional (with only height and width). Escher thought this idea was a very conflicting situation and he tried to show examples of this conflict very closely in several of his prints, such as this one. The idea makes people think.
Project Ideas
- (4th and 5th) Contour drawing—Lay the hand you DO NOT use to draw with, on top of the desk in front of you. Put your pencil on the paper and do not look at what you are drawing until you are finished. Now, slowly follow the outline (contour) of your hand with your eyes and move your pencil along as you look at it. Do not look down at your paper! If you are concentrating on what you are doing, your pencil hand will move the same way your eyes move. Be sure to carefully follow the outline (contour) at every curve and bump. Once you finish the main outline without looking, you can draw in the details (the wrinkles, bumps of your knuckles, and curve of your fingernails) as you look. You will see that the details are easier to do more realistically when you try to repeat the eye following technique, once you line up your pencil at the starting points.
- (3rd and 4th) Expand on the idea of the deception of drawn pictures and teach or review the relationship between SHAPE and FORM. Use poster board to create the three-dimensional forms of a cube (use pattern), cylinder (roll rectangle into a tube and tape), and a cone (slit one side of a circle to the center, overlap and tape). After these FORMS are taped together, draw SHAPES of a cube, cylinder and cone on paper. Shading helps fool the eyes and gives a more three-dimensional appearance.
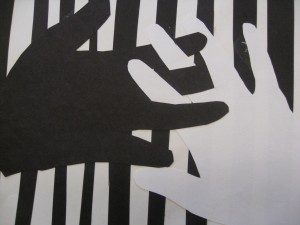
- (1ST and 2nd) Trace the outline of both of your hands on a piece of white construction paper with a pencil. Be sure that the hands overlap each other just a little. Now, use two different PRIMARY COLORS (yellow and red, red and blue, or yellow and blue) to paint the part of the hands that do not overlap each other. (Leave the overlapped area unpainted for now.) Paint each hand a different color. Always paint the very first hand with the lightest color. Now, mix colors to create a SECONDARY COLOR. Fill in the unpainted SHAPE (created where the hands overlapped) with the mixed SECONDARY COLOR, which the two Primary Colors created. If the teacher will allow you to come in a day or two ahead, trace the kid’s hands in advance. Be sure that every set of hands has the child’s name printed legibly on it. Kids always love to paint and this is quicker and more fun than an entire color wheel. It also teaches or reviews an important color lesson for these two grades. Advance preparation with the hand tracing will pay off in a big way for this project. Consider working with another classroom parent to trace the hands ahead of time, as well as for the painting. KIDS WILL NEED TO RINSE OUT THEIR BRUSHES WELL BEFORE PAINTING THE SECOND COLOR! The first color will be drying while they do this, which will help the colors stay truer. The brush will not need to be rinsed to paint the overlapping area, since the colors are going to be mixed anyway.
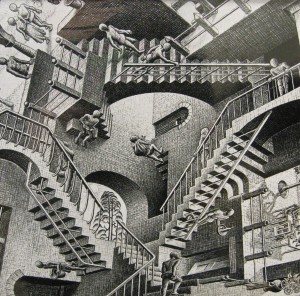
5. “Relativity” by M.C. Escher (1956)
About the art
At first glance, the picture seems to be filled with several uniformly faceless figures situated in some kind of staircase scene. The spatial situation of each SINGLE figure appears to be quite clear. The play with spatial perspective and the optical confusion begins when the person tries to get an overall view of the entire picture. The confusion happens when we realize that the strange looking people in the picture do not have a common perspective, even if the artist drew them close to each other. For instance, while one drawn surface forms the ceiling for one of the figures, that same surface is the floor for another.
The rule of central perspective calls for a VANISHING POINT that all HORIZONTAL LINES have to be laid out and fixed to. By having THREE vanishing points (which are placed outside the actual picture), Escher creates three independent but related worlds built together into a united whole. Despite the fact that they appear to be linked by the architecture, they are rationally incompatible with each other because of our experience of the real world.
What type of BALANCE do you see in the picture? Radial Balance, in every angle of the picture, no matter which way you turn it, the design moves out, or radiates, from the center.
How many little figures, or strange people, can you find in this print? There are 16.
The sixteen figures can be divided into three groups, each of them inhabiting a world of their own. What is a ceiling to one group is a wall to another, what is a door to one is a trapdoor in the floor to another.
(Choose just two parts of the following discussion for Kindergarten and 1st grade, they do not have as long of an attention span.)
To discuss this picture, we need to give each group of people a name. We are going to begin with the UPRIGHTERS—the figure seen walking up the stairs at the bottom of the picture. (Check for the alignment of this page on the back of the picture to be sure that you are holding it correctly and point out this figure.) The UPRIGHTER’S heads point upward.
Can you find any other UPRIGHTERS? One looks down over the staircase railing from upstairs, on the upper far right. Another is on the second step of a stairway that disappears after the third step, in the center of the far left edge.
(It will be helpful to use the overhead screen and point this out with the tip of pencil eraser—you do not want to mark on the matting with the pencil point. Be sure the kids are following along with you as you explain.)
The other two sets of figures will be called the LEFT-LEANERS, whose heads point leftward and the RIGHT-LEANERS, whose heads point to the right.
There are three little gardens in the picture. UPRIGHT number 1 (lower center) can reach his garden by turning to the left at the top of the stairs he is now on, and walking up this second set of stairs. All we can see of his garden is a couple of trees and a shining sun. If he stands in beside the archway leading to his garden, he has a choice of two staircases leading upward. If he takes the left-hand one, he will meet two more of his companions—one going up the stairs and the other going down on the other side. We are not able to see the ground that the UPRIGHTERS are standing on in this picture, but very large areas of their ceiling are visible in the upper part of the print.
Are you following along with my explanations so far? If you look away, you will probably get lost and not be able to catch up, so PAY ATTENTION. (Review the garden once more, if indications show that many of the class are lost, but do not repeat again until you have finished the entire explanation. Each pause with a question will give kids a chance to catch up, unless they do not intend to follow along and listen.
To see the next group—the LEFT-LEANERS—more clearly, turn the print sideways to the kid’s left (your right if you are standing behind the picture instead of facing it). In the center area of the picture, and up against one of the walls, a LEFT-LEANER sits reading.
Do you see this first LEFT-LEANER?
If you follow the staircase the first LEFT-LEANER is resting against, and keep going up the next staircase, past the landing, you will see another LEFT-LEANER walking up the stairs. If he were to look sideways and a little behind himself, he would see a RIGHT-LEANER not far from him. He would think the RIGHT-LEANER’S position very odd because it appears that he is gliding along DOWN the same staircase in a reclining, restful pose, defying gravity. The RIGHT-LEANER and the LEFT-LEANER here are at right angles to each other. Can you find these two fellows?
A third LEFT-LEANER is going down another staircase, near the center to the right, towards a half opened door on his left. This LEFT-LEANER carries a tray with a bottle and glass placed on it. Raise your hand if you can see this third LEFT-LEANER. It looks like there are some (a few) sharp eyes in this group!
The LEFT-LEANER’S garden is above the figure with the tray. There are two more LEFT-LEANERS sitting at a table eating, on the edge of the garden beneath the arched opening. What is different about these two LEFT-LEANERS? They are female What does it look like these two are eating? It appears to be two loaves of bread on a plate, a bowl of something, and the LEFT-LEANER sitting sideways appears to be cutting something on her plate, possibly a piece of meat.
The RIGHT-LEANER group can best be seen if you turn the print sideways to the right, so you can see the UPRIGHTERS again, and then to the right again (your left if you are standing behind the picture instead of facing it). In the center of the picture, you can see a RIGHT-LEANER, carrying a sack over his shoulder, coming up out of the cellar. I think this figure was one of the easiest to find, do you? Above him, to the left, a second RIGHT-LEANER is coming down a staircase carrying a basket.
Do you notice how the artist has made each figure look distinctly different, although they have no faces, so we can find our way through his puzzle? The figures carry different objects or are engaged in a different activity. Only four figures are only walking up or down the stairs without carrying something that makes them unique.
Can you find the RIGHT-LEANERS garden? How many figures can you see there? There are three here in the garden area. Two RIGHT-LEANERS, one male and one female, are walking with their arms around each other. One RIGHT-LEANER is standing in front of a short wall, looking at another RIGHT-LEANER walking down the stairway in front of him.
There are three different forces of gravity working at right angles to each other in this print. This means that one of the three existing surfaces serves as a ground for each of the three groups of people. The picture makes sense only in three directions. If you turn the print completely upside down, it makes no sense at all.
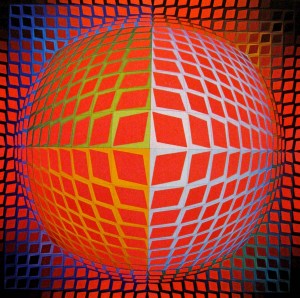
6. “Vega-Kontosh” by Victor Vasarely (1971)
About the Artist
Victor Vasarely was born in 1908, in Pecs, Hungary. In 1925, Vasarely entered the Medical University in Budapest but, by 1927, he had decided to become an artist and began his studies at the Podolini-Volkmann Academy, in Budapest. After his first art exhibit, held in Budapest in 1930, Vasarely moved to Paris, where he lived for the rest of his life. He is now considered a French painter.
Vasarely became increasingly obsessed with the interaction of SPACE, COLOR and MOVEMENT in his paintings. He sometimes even went so far as to note what type of lighting his paintings should be viewed under. In 1955, he introduced a style of painting optical illusions that gave a realistic impression of actual movement.
Vasarely was a pioneer in the art of optics. He was instrumental in the development of almost every form of optical device for creating the art of visual illusions, many years before computers came along. Vasarely’s optical designs were not created with the help of a computer. He took the time to carefully plan his work as he painted it. Vasarely was one of the very first to experiment and develop the Op-Art style we see here.
About the Art
What GEOMETRIC SHAPES can you see in this picture? Squares and a round circle, created in the illusion of a three-dimensional sphere, is hidden in the center
This design began as a grid. A grid is made of parallel lines placed the same distance apart, in horizontal and vertical directions, which create squares. The grid squares are usually all the same dimensions, just like graph paper.
The artist painted several “Vega” variations from 1970 to 1976. One version, created with the same illusion of a protruding three-dimensional sphere as this painting, has both circles and square shapes alternated inside the grid. The artist had this to say about his Vega series of paintings: “The Vegas have something monstrous and disquieting about them”.
What do you think the artist meant by this? What type of feeling do you get when you look at this picture? How would you describe the MOOD the painting creates?
What has the artist done to change the grid? The squares are larger in the center and smaller along the edges. Each square seems stretched, squashed and a little lopsided.
How did the artist change the LINE QUALITY of the grid lines? He created heavier lines for the squares in the circular center. The heavy lines are angled. In the crossing lines of the four center squares, the lines of the squares appear to be widest in the center and narrow on the outside edge.
What type of BALANCE does this picture have? Radial balance, the design moves out from the center.
The artist has divided the picture into several distinct sections or areas.
How many main sections has the artist divided the picture into and how did he do it? The picture is divided into four large square sections using LINE. The large illusion of a three-dimensional circle, or sphere, creates another section in the center of the squares.
Can you find four areas where the artist used only the element of COLOR to create a third division in the picture? In each corner, the artist painted dark squares of background color.
Can you see any triangles in the picture? Not at first, but if you look in the center for a minute four rounded triangles move out diagonally from the center.
Move your head and eyes across the picture, from side to side. Now, move your eyes up and down across the picture. Can you see this optical illusion move?
If you have trouble seeing the picture move, try again but make sure that your head moves with your eyes. The circle in the center seems to come alive. There are no special lenses or devises attached to this painting to create the optical effect. The artist has created this unusual effect by using only LINE and COLOR.
Project Ideas
- Use graph paper to color in various LINE PATTERNS. Create diagonal, horizontal, and vertical patterns with your choice of colors.
- Use a compass to draw a large circle in the center of a piece of construction paper. Use the compass to draw three more increasingly smaller circles inside this circle, creating a CONCENTRIC PATTERN. This type of pattern radiates from the center like a target. Remember that you are creating a work of art and do not want to paint an actual target, because a target’s rings or circles are all evenly spaced and boring. Vary the spacing between each circle to add interesting variety. In the NEGATIVE SPACE around your concentric circle, use a ruler to fill in a grid of squares. Your squares can be any size you choose but you are going to paint them so make sure they are not too small. Paint your concentric circle using all three PRIMARY COLORS and one SECONDARY COLOR. Paint any sort of PATTERN in the squares of your negative space, using the other two SECONDARY COLORS. BE SURE TO CLEAN YOUR PAINTBRUSH EXTREMELY WELL BETWEEN EACH COLOR. The painting will have the best artistic impact when the colors are as clear and true as possible.
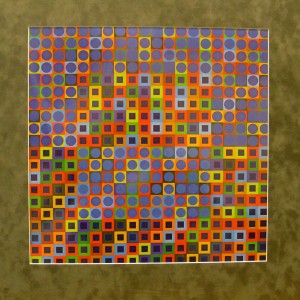
7. “Zebegen” by Victor Vasarely (1964)
About the Artist
Victor Vasarely was born in 1908, in Pecs, Hungary. In 1925, Vasarely entered the Medical University in Budapest but, by 1927, he had decided to become an artist and began his studies at the Podolini-Volkmann Academy, in Budapest. After his first art exhibit, held in Budapest in 1930, Vasarely moved to Paris, where he lived for the rest of his life. He is now considered a French painter.
In the 1960’s, Victor Vasarely began using bright and brilliant COLOR in a way he had never done in his career up to that time. Using small, GEOMETRIC SHAPES, combined with strong CONTRASTING COLORS, and bright backgrounds, this artist’s use of color began to create illusions of vibrations and MOVEMENT that dazzled the eye and bewildered the viewer’s perception.
Suggested Dialogue
What sorts of SHAPES are seen in this picture? Geometric squares and circles
Are there any ORGANIC SHAPES? No, organic shapes are natural shapes like a seashell or rock
How many COLORS did the artist use to color the squares in this picture?
(I did not have the time to count them myself.) For Kindergarten, point out and say the colors together.
After pointing out three colors, ask kindergartners if they see any additional colors. At this grade level, it is important to introduce them to taking the time to look at the details of the artwork. This picture is very active and busy, like kindergartners. The busy colors can invite these younger kids to look closer if you guide them with just a few COLOR and GEOMETRIC SHAPE questions.
What COLORS did the artist use for the LARGE squares?
What COLORS did the artist use for the SMALLER squares in the centers of the larger squares?
Are the colors the same for the squares with CIRCLE CENTERS compared to the squares with smaller SQUARE CENTERS?
Suggested Activity
Cut out large square pattern shapes (from Zebegen Inspired Project Pattern Sets page found in Folder #2 Project Patterns & Visuals, the file titled Packet 18. Zebegen patterns) to trace squares of colored paper in the 6 basic PRIMARY and SECONDARY colors. Pass out two sets of these six colors to everyone in the class. Use the pattern to cut one small gray circle for each person. Direct the class in a discussion as everyone experiments with the effects created by each color as the neutral gray circle is placed in the center of one square of color at a time. Instruct kids to place two squares of the same color in front of them. They should be spaced a few inches apart.
Are these two colors exactly the same? (They should be.) Next, place the gray circle in the center of one of the squares. Do these two colors still appear the same?
In this activity, the neutral gray reflects and slightly changes the color it is sitting on. Grades 4-5 should be able to notice this small change but younger kids will not. For instance, yellow tends to take on more of a green cast. The neutral gray causes an illusion with our eyes. The two same color pieces need to be spaced far enough apart so that the color difference is noticeable. Play with the color variations at home ahead of time to become familiar with the color effects, to figure out how far apart kids should place their color squares, and to create a smoother dialogue with the class as you lead this color experiment.
Project Idea
Use the Zebegen pattern sets page to cut out a set of patterns for everyone. If volunteer cuts out the shapes, they will be much smoother for kids to trace around and save time for the project. There are many color effect suggestions included on the pattern page to help create a dramatically colorful layered geometric pattern design.
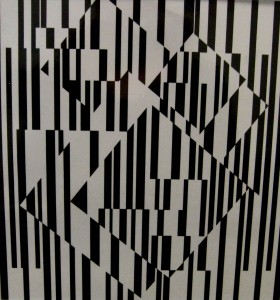
8. “Black and White” by Victor Vasarely. Oil on wood.
Vasarely had a lifelong fascination with line patterns and grids, even the ordinary longitude and latitude line grids found on maps were interesting to him. He liked painting patterned, geometric and abstracted subjects. Vasarely created several different series based on the patterns of tigers, zebras, checkers and harlequins (a type of clown whose costume is typically decorated with geometric pattern).
This picture is filled with LINE. What type of LINE do you see here? Vertical and diagonal
Describe the LINE QUALITY. Some lines are thick, wide, heavy. Some lines are thin, skinny, or narrow. All lines are straight.
What types of SHAPE do you see? Geometric squares turned to create diamonds, also partial rectangles
What do you see in the BACKGROUND?
The shapes of this picture are created by manipulating the POSITIVE and NEGATIVE SPACE.
Which SHAPES appear to move forward?
Which shapes seem to be layered between the BACKGROUND and the FOREGROUND?
Project Idea
(4-5) Turn the paper horizontally. Use a ruler and a pencil to fill the paper with straight, horizontal lines, spaced approximately the same distance apart. (Use a ruler to measure and mark each edge before you draw the lines across.) If you want the picture to be more dramatic, space three of four of the lines a little closer together than the others. Now, use a compass to draw a circle somewhere on the page. Then, use your ruler to draw two different sized squares, turned like diamonds on the paper. (For your first try, it is better not to OVERLAP these shapes and easier to use only three shapes.)
You are going to use a black felt marker to color in alternating line pattern. To do this correctly, you will need to mark the areas for coloring ahead of time with your pencil. First, for coloring in the horizontal stripes, place an X between every other line from the top to the bottom. The section between the lines becomes positive space when black is added to create the stripes. But you will not completely color in all areas of the stripes and that is why the areas first need to be marked with an X. Wherever your SHAPE lines cross the horizontal lines, you will change the alternating pattern. If you have marked a black line going across the top of your circle, you want the part of the line that is inside the circle to stay white. Put an X in the stripe beneath the area in the circle that is to stay white, so you will color it black. Color each stripe all the way to the curved edge of your circle. The stripes inside the circle and the alternating stripes outside of the circle will both have curved edges, where they meet the circle line. Change the stripe PATTERN inside the square SHAPES so the pattern is also opposite here. Be careful to color stripes neatly. When you finish you will see that you have also created a perspective illusion similar to Vasarely.

