1. The Melody Haunts my Reverie
2. Red Barn II

3. Turkey
4. Haystack
5. Explosion No. 1

6. Look Mickey

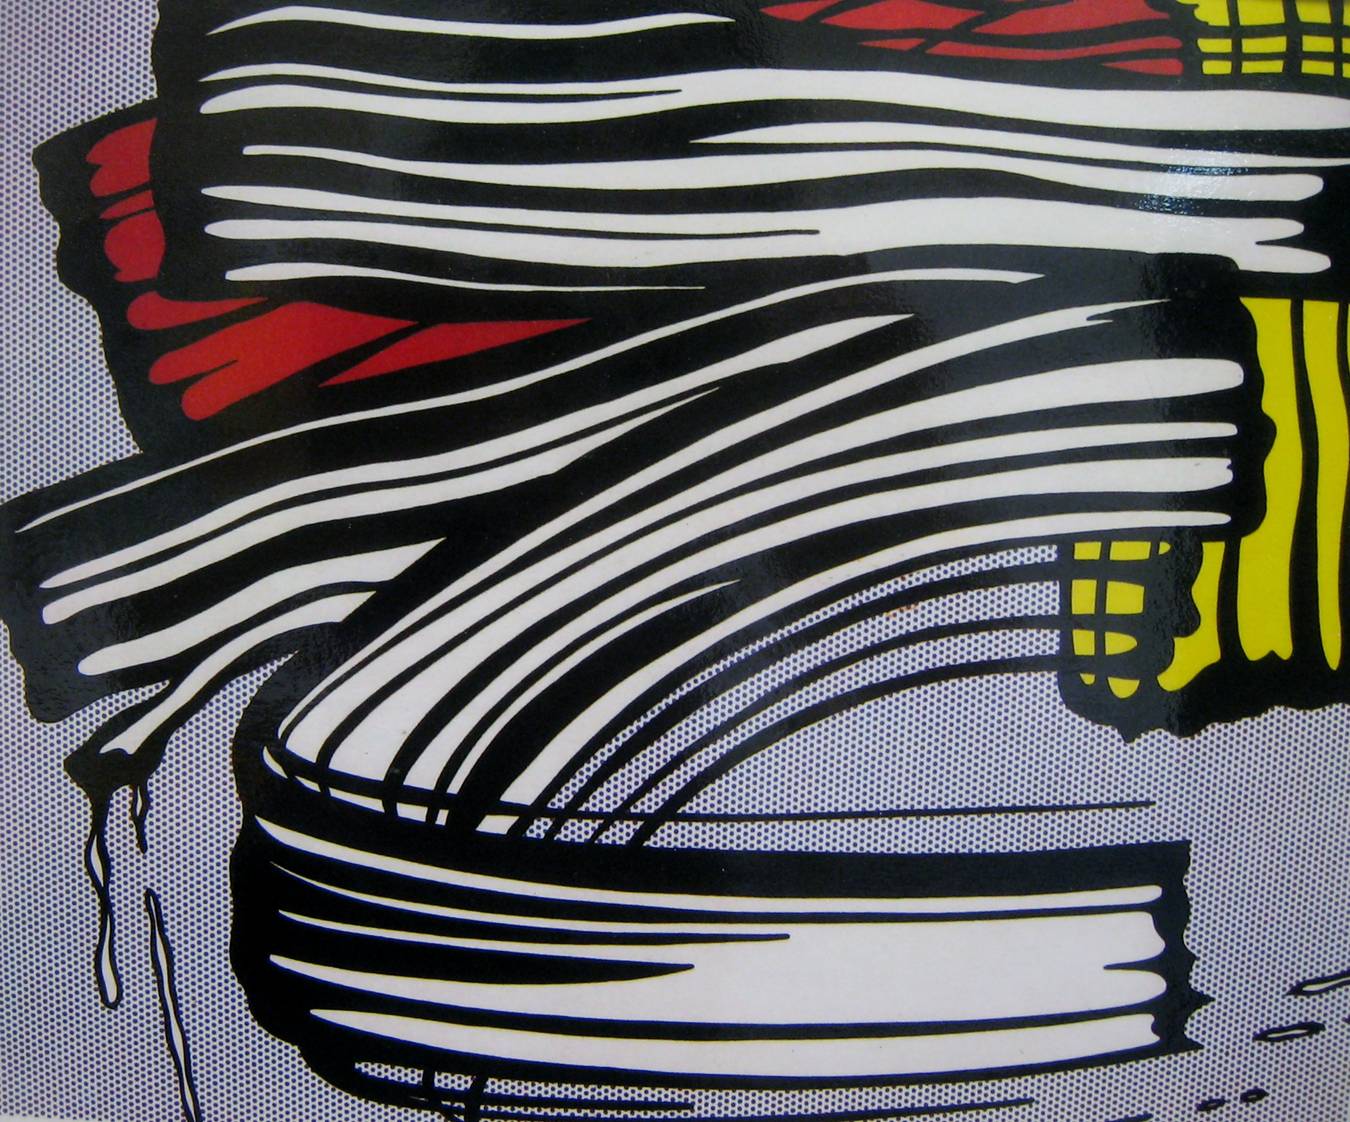
7. Little Big Painting
8. Washing Machine

9. Whaam!

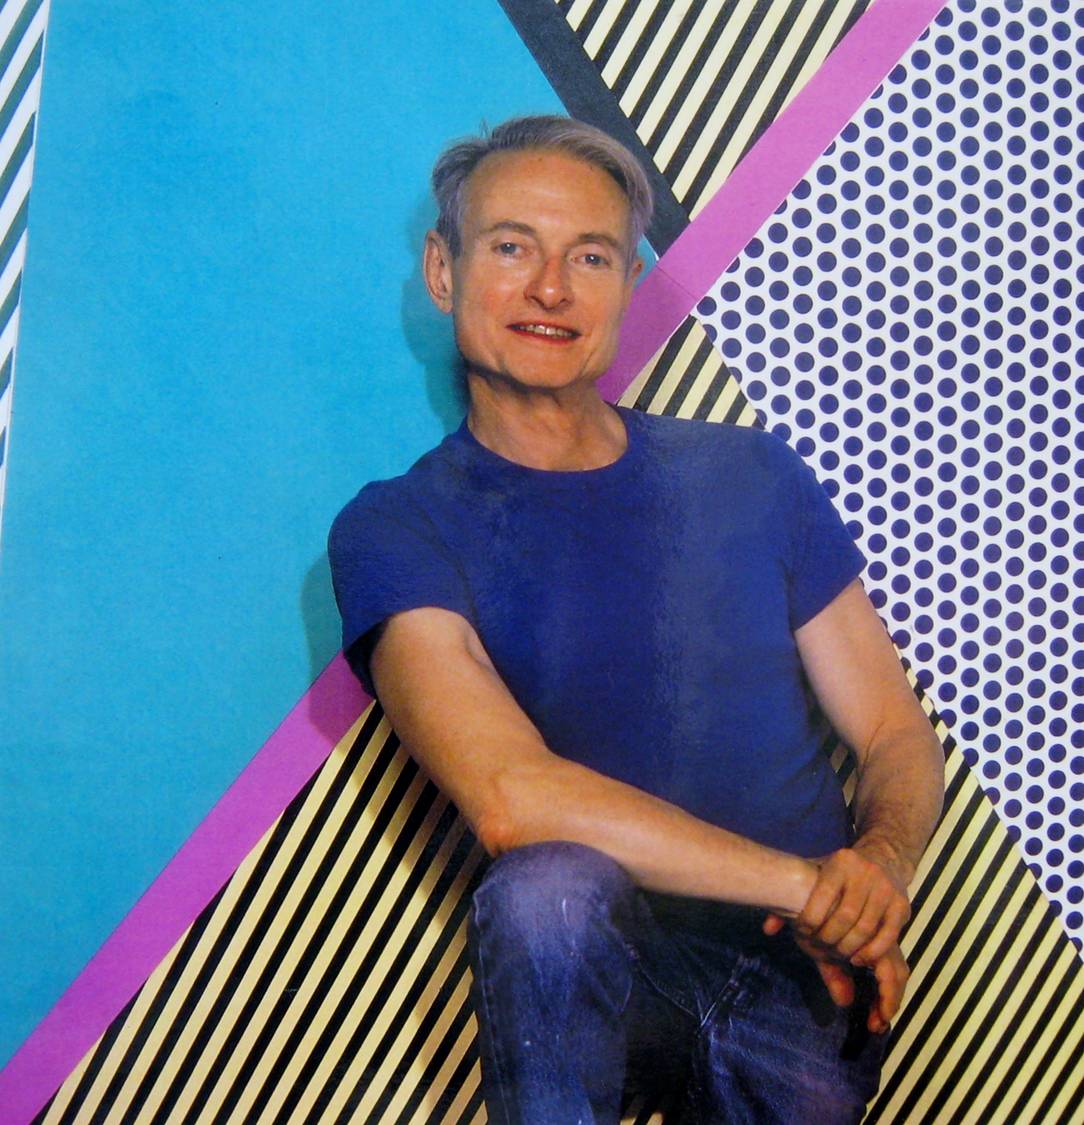
10. Photo of the Artist
By adapting the look of advertising and comic strips, Roy and many other artists began to change the ideas of what art is or what it should look like. Lichtenstein has been considered an influential artist in what eventually came to be called POP ART. This type of art used things that were “POPular” in the American culture of the 1960’s as the subjects for paintings and sculptures. Examples of this were Campbell’s Soup cans, painted by Andy Warhol, and comic books, which Lichtenstein painted.
The art of Roy Lichtenstein is a wonderful opportunity for discussion and projects on the subjects of LINE, SHAPE, COLOR, POSITIVE SPACE, NEGATIVE SPACE and PATTERN.
Even if you don’t discuss all of the pictures in this packet, it is highly recommended that you display them all to give an idea of the variety of work this artist did and because his work is so unusual.
Consider asking 4th and 5th grade classes to research Benday dots or Benjamin Day the month before you visit the classroom with this packet. Discuss this idea with the teacher. Consider offering a reward as an incentive (sticker, etc.). It will help create a more informed discussion.
Consider checking out books from the Library to bring in and share the artwork of some of the other well known POP ARTISTS—Andy Warhol, Claes Oldenburg, Frank Stella, Hans Hofmann, Morris Louis, Robert Rauschenberg, Mark Rothko, or Robert Motherwell.
Be sure ALL 10 pictures are returned to the Packet Carrier after your Presentation.
Roy Lichtenstein
Roy Lichtenstein was born in New York, in 1923. Roy began taking summer art classes at the Art Students League in New York, in 1939, while he was still in high school. When he graduated from high school, in 1940, Roy decided that he seriously wanted to study to become an artist. He later completed his studies at Ohio State University.
Roy liked jazz music and was a very private man, who kept his personal life very confidential. After finishing college and serving in World War II, Roy worked as an Art Instructor at Ohio State, and as an Assistant Professor of Art at New York State University, Oswego University, Douglass College, and Rutgers University, in New Jersey.
Lichtenstein has been considered an influential artist in what eventually came to be called POP ART. Roy also experimented with painting styles of Abstract Expressionism and Cubism. In 1951, he tried sculpture assemblages of “found objects” and carved wooden objects, which showed horses, knights in armor and Indians.
Roy began his Pop Art comic-strip paintings in 1961. He is best known as “the guy who painted comics,” but his comic-strip phase only lasted from 1961 to 1965. These paintings caused him to be nominated as “the worst artist in the world,” by LIFE magazine. Roy’s paintings were made using only the primary colors or black. He tried to copy the colors and the style of the Benday printing process used in the printing of comics. “I was trying to imitate cheap printing…something done by a printing press,” Roy said.
At first, Roy dipped a plastic bristled dog-grooming brush into the paint to make the dots. Later, he used metal stencils, then paper stencils, for painting his Benday dots. This new technique became Roy’s unique trademark style.
In his many years as an artist, Lichtenstein received many tributes and awards. His paintings, drawings and sculptures have been shown in museums and galleries all around the world. Roy and his wife lived in South Hampton, New York, until his death from pneumonia, in September of 1997, at the age of 74.
What are Benday Dots?
(A simplified explanation and description of Benday dots is included in the picture description pages. This technical explanation is to give volunteers a deeper understanding of the process and its history.)
Although not all of Lichtenstein’s early art used Benday dots, they have now become synonymous with his art. Since Benday dots play such an important role in Lichtenstein’s work, this is a brief explanation of their history:
Benjamin Day was an American who was both an artist and an inventor. He was born in 1838 and died in 1916. Benjamin’s father had been the founder of the New York newspaper, the Sun. This probably influenced his career choice. Although Day had studied art in Paris, he returned to New York when he was 25 years old to draw illustrations for Harper’s magazine and other publications. At this time, illustrations were engraved on wood for printing by hand. The process of wood engraving worked in much the same way a rubber stamp prints a picture. The artist drew his sketch on a block of wood and then carved (engraved) the design into the wood, which was inked to create a print of the illustration. At first, this type of illustration was only a black and white line drawing. Any color had to be painted on by hand, after the picture was printed. Around 1878, Benjamin Day invented a method of coloring these drawings while printing, officially known afterwards throughout the world as the “Ben Day Rapid Shading Medium” (shortened to Benday dots).
In 1916, the magazine Scientific American described this Benday method of adapting a drawn image to the industrial printing process for Benjamin Day’s obituary:
”The principle of this invention is a transparent gelatin film mounted upon a frame, the film being smooth on one side, with lines, stipples or texture in relief on the other. The relief side of the film is inked by a printer’s gelatin roller, the film being supported by a cushioned pad invented for the purpose. The film, thus inked, is placed (inked side down) upon the drawing outlined on metal, stone, or cardboard, the drawing being visible through the transparent film. Pressure on the back of the film by a stylus, or rubber roller, transfers the inked pattern of the film upon the drawing where desired.
At first, all that was attempted by the inventor was the laying of ‘flat tints’, but he soon saw that to obtain effects similar to those of wood-engraving, it would be necessary to achieve gradations of color in lines and textures. Toward this end, he invented a registering apparatus to hold the shading film in position and, at the same time, by means of micrometric mechanism, within the same, make feasible the gradual shifting of the printing film over the drawing in order that successive prints might be made exactly where wanted, thus increasing the color of the first ‘lay’ by repeated movements to any degree desired. The drawing, thus made, was afterward reproduced in plate form by the process of photoengraving.
What Benjamin Day did seems brilliant at first—the different parts of an image were visualized as outlined sections, which could be filled in with small regular geometric shapes (dots) of color. Day was the one who found an industrial way to use an optical principle that had been developed during the nineteenth century by color theorists. They discovered that our eyes naturally blend small dots of color, placed near each other, when viewed from a distance. The Impressionist and Pointillist painters of the nineteenth century also applied this same optical principle in their own styles of paintings. Benjamin Day invented a change in color printing that was almost as remarkable in its day as the invention of home computers.
POINT
[TO ART DISCOVERY VOLUNTEERS—this activity is especially appropriate for Packet 22. Pop Art— Roy Lichtenstein, but Impressionist paintings found in Packets 10. …a Poem Lovely as a Tree…, 12. Still Life, and 15. American Visions of the Sea are created in a similar way, using small dabs of painted color. These POINT activities would help kids understand Impressionism better and help illustrate the Benday dot technique of printing, which Lichtenstein is famous for. Bring in Comic Book pages, some newspaper photos, and small magnifying glasses (found inexpensively in party goods sections). Have kids find the Benday Dots in these pictures. You may also bring in Pointillist and Impressionist picture examples to examine and compare with the magnifying glasses. Activity applies K-5. Cover this message before making copies of the page for the class.]
POINT is the most fascinating of visual elements because it is the smallest of marks but can be used to build any picture. A point, to be technical, has no width, height or depth—it is more like a dot.
POINTS and dots of color can be found in paintings from many different periods. One group of artists, the Impressionists, tried working entirely with small painted points of color to achieve very vibrant and rich results. They wanted to create colorful visual effects that were as close to what the eye really sees as possible. Rather than mixing the paints together on the palette, impressionists would put tiny dabs of pure color side by side on the canvas, so that the eye would mix the colors. (Yellow points next to blue would create green; red next to yellow would create orange, etc.) The overall effect is intense.
The Pointillists took the idea of color POINTS a step further, by more carefully creating smaller, finer dots of color, compared to the impressionist’s somewhat larger dabs of color.
POINTS and dots are also used in printing, to create pictures. If you use a magnifying glass to look very closely, you can see that a newspaper photograph is composed of many tiny black POINTS, called Benday Dots, named after their inventor, Benjamin Day. Notice how the darker areas have dots very close together while lighter places have dots spread farther apart. The newspaper’s colored Sunday Comics are also created with Benday Dots.
POINTS MAKE SHAPES
ACTIVITY #1:
To build knowledge of POINT as an Element of Design in Art and the environment, construct each of the following shapes using only POINTS (dots), instead of LINE: SQUARE, CIRCLE, TRIANGLE, OVAL, HEXAGON and STAR.
Divide a 9”x12” (or larger) piece of drawing paper into six equal parts. Begin from the center of the first shape and work the dots toward the outer edge of the square (see diagram). Once the edge has been reached, return to the center of the next square and begin the next shape, in the same way. Continue until you have filled all six of the squares with each of the six listed shapes. Which shapes were the most difficult to draw with the POINT drawing technique?
CREATING A PICTURE OR DESIGN WITH DOTS
ACTIVITY #2:
POINTS or dots can be used to build up a design or a picture, from its simplest beginnings to a highly refined, completed work (such as the POINT design, on the previous page). One way to start a picture or design made of POINTS is to first close your eyes and picture rain in a storm or snowflakes falling. Think of how the drops of rain or snow completely fill the air. Next, picture waves on the ocean, crashing against rock, and the millions of small water droplets sent splashing into the air.
Now, make a drawing using only dots, created with a pencil. Begin by placing POINTS on the paper in patterns that fill in different shapes (similar to what you did in the first activity). Use only a pencil and POINTS to create your picture or design (no LINES or COLOR). Make some shapes curvy and some shapes angled, or straight. Fill in some shapes with POINTS very close together. Fill in other shapes with larger dots, or POINTS, spread farther apart. At first, the POINTS will be very sparse, but with the addition of more dots, some parts of the design will become dense and dark and create interesting differences in your design. The results will be subtle, with slight differences. Avoid details until you are almost finished.
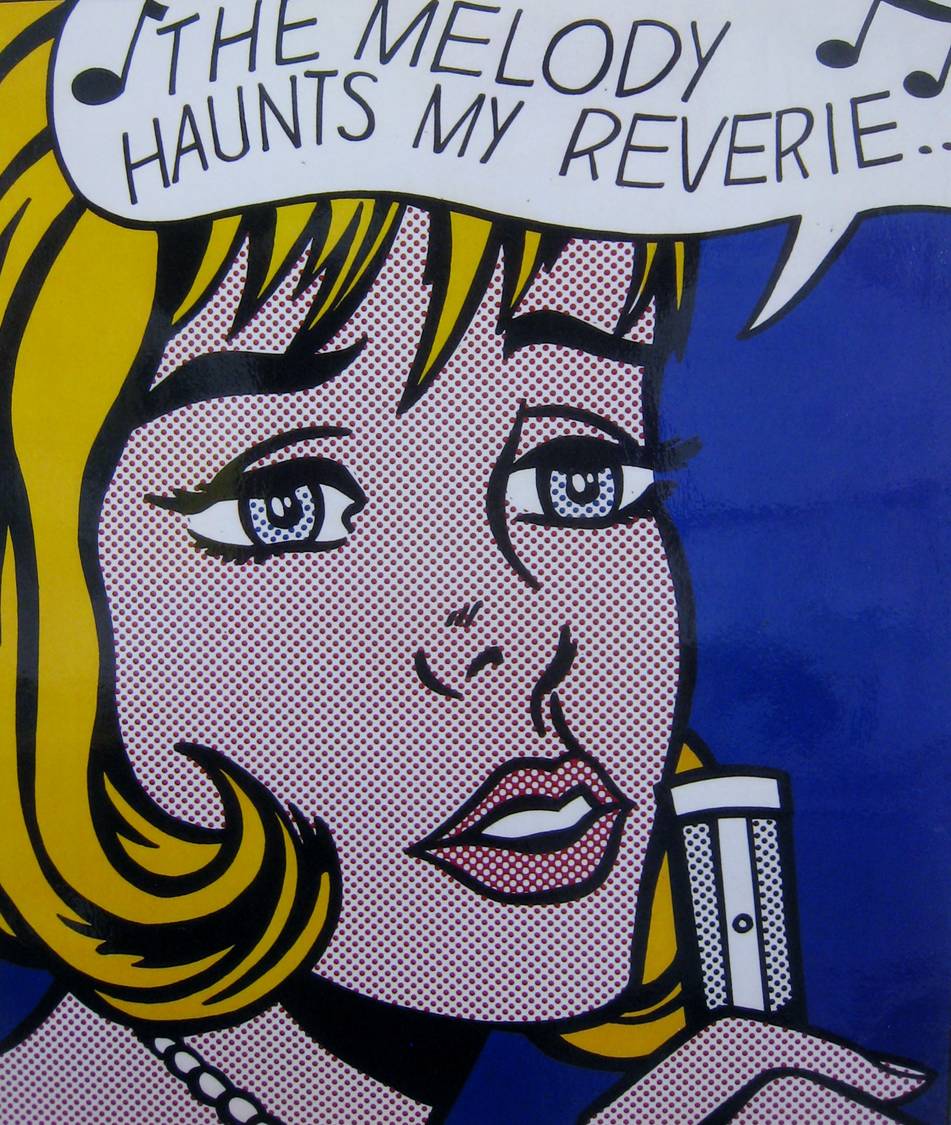
The Melody Haunts My Reverie
Silkscreen, 28” x 21”
(1965)
In the 1950’s and 1960’s, old series pulp comic books used “Benday” dots, in the primary colors and black, to inexpensively color the comic outlines. Depending on the color, the effect, or the optical illusion needed, the dots might be close together or overlapping. To create a green shirt for a comic character, yellow and blue dots might be printed close together (or overlapping) to fool a person’s eyes into naturally blending the two colors together, to see green.
☺ Suggested Activity
The Sunday comics in the newspaper are still printed using Benday dots. Pass out a piece of Sunday comic strip to each student. If you can find small, inexpensive plastic magnifying glasses (in party goods) pass these out also. Don’t worry if you can’t find or afford magnifying glasses. Most of the Benday dots are easy enough to see with the naked eye.
Tell the class to look at the colored sections of the comics very closely. Discuss the fact that they will notice that large areas of SOLID color found in the comics are really areas with many small DOTS of color. The only ink colors used are the PRIMARY colors—red, yellow and blue, along with the black outlines. All of the other SECONDARY colors—orange, green, or purple—were created in the comic by combining two or more PRIMARY colors of ink in the printing process.
When you see the dots through the magnifying glass, you might notice that some dots are larger than other dots. Some dots are father apart, to create lighter colors, and some dots overlap, to create heavier color.
About the Art
Benday color printing was invented by an American printer named Benjamin Day. Benjamin created a stencil of small dots, which he used for shading the printing plates, to print colored maps and pictures. The word “Benday” comes from the name of the inventor of this process—Benjamin Day.
This is one of Roy’s famous “Romance” comic paintings. In these comic paintings, Roy created his own bold way of using PATTERNS and LINES. Notice how the skin is painted with a large pink dot pattern. These dots are exaggerated versions of the Benday dots you can see in the newspaper comics that I passed out. In the Sunday comics, you need a magnifying glass to clearly tell that the colors are created with dots. Lichtenstein exaggerated these dots, so that your eyes HAVE to notice them. Roy realized that exaggerating the comic printing techniques and adding the text balloons strengthened his painted picture and added a baffling new quality no one else had used in fine art. Where can we find thick exaggerated LINE and CONTOUR LINE in the painting?
The question the public wondered about was this—Could an enormous comic really be considered art? Many art critics were shocked and outraged and did not approve of his artwork. Many people felt that Roy’s work could never be serious enough to be considered “real” art.
Roy painted an enormous mural of one of these “Romance” comic paintings for the Seattle World’s Fair, in 1964. He used oil paint on plywood and the painting was 20 feet by 19 feet. It was a picture of a smiling, red headed girl, in a yellow dress, leaning out of a window. Her skin was colored in this same exaggerated Benday dot pattern.
Red Barn II
45” x 56”
(1969)
What type of painting is a scene like this? This is an outdoor scene, or a LANDSCAPE.
How many colors did the artist use in this painting?
How did the artist create the clouds and the reflection on the roof of the barn? By leaving these areas white, instead of adding color with Benday dots.
Is this landscape a REALISTIC painting or an EXPRESSIONISTIC painting? Roy was an EXPRESSIONISTIC painter. He was more concerned with creating a MOOD or and idea, than in creating a realistic painting.
Project Idea
- Draw a simple barn in a simple landscape similar to this Lichtenstein picture. Color most of the picture with the colors red, yellow, blue and green. Highlight several areas of the picture by gluing on small shapes cut from a dot template and colored. Color the dots AFTER the glue is dry, if you are using white glue with markers, otherwise the ink will run. The sky would be an easy place to use the dots. Examine this picture to help plan the places you would like to add sections of dots for coloring. Be daring and do something very different!
- (Grades K-2) Use a pencil to create a simple landscape picture of only hills, sky and sun (see below). Be sure the HORIZON LINE is in the top third of the horizontal page. Instruct kids that they will create a landscape outline using only two squiggly horizontal lines and one geometric shape (circle). Demonstrate this by drawing two different examples on the board. Use cotton swabs to create a PATTERN of dots in the sky. Leave some areas of the sky unpainted, to create clouds. Color in the rest of the areas of the picture with thick crayon, using only red, yellow, blue, and green. Outline all of the colored areas of the picture with thick, black crayon.
Little Big Painting
Oil on Canvas, 68” x 80”
(1965)
In this painting Lichtenstein uses a mechanical style to paint a very unmechanical image—a brushstroke. This is really a painting about a painting.
Roy uses Benday dots for skin tones, backgrounds and shading. Where else does he use Benday dots?
How many colors do you see in this painting? Red and yellow
Can you name two artistic ELEMENTS that the artist used to create this painting? Line, color, dots (or points)
Project Idea
Use a 4” sponge brush to create a brushstroke of red or yellow tempera paint on a white background. When the brushstroke dries, create wide lines in the brushstroke with black marker. Create a wide black contour line (outline) around the brushstroke. Create a PATTERN of black Benday dots, in the background behind the brushstroke, using cotton swabs. Be sure to dip the tip of the swab EACH time you touch it to the paper. This will help the dots stay more uniform in size.
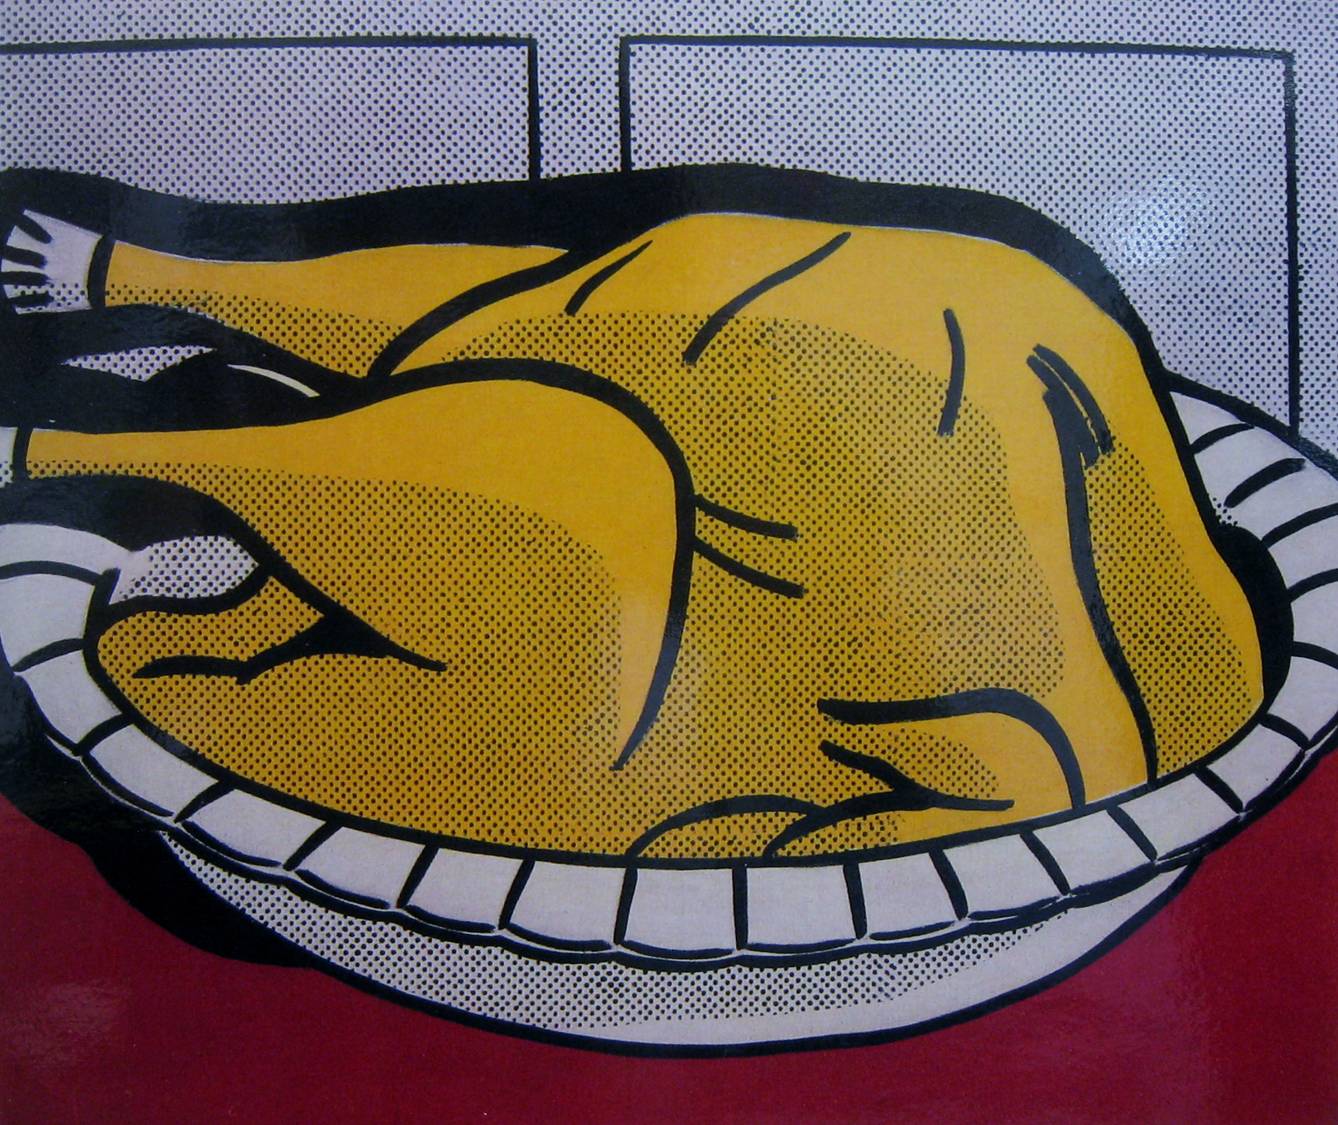
Turkey
Oil on Canvas, 26” x 30”
(1961)
(Cover the Norman Rockwell painting, next to Turkey, before displaying to class.)
Early in his work, Roy chose subjects for his paintings that were from his American culture and its media. These were advertisements and symbols familiar to Americans. In this Lichtenstein painting, the subject is a cooked turkey. The artist has focused so closely on the turkey that there is very little background in this picture.
Do you think a cooked turkey is a beautiful subject for a painting?
What does a cooked turkey make you think of?
POP ART focused on POPular images found in America. What could be more uniquely American than the ritual of Thanksgiving dinner? (Uncover the Norman Rockwell painting.) Compare this picture with the Norman Rockwell painting “Freedom From Want”.
How are these paintings different and how are they similar? Does either of these paintings seem more fun, or silly? Which picture is an example of EXPRESSIONISM and which is an example of REALISM?
Art critics were outraged when they saw Lichtenstein’s simple-minded Turkey painting. How could any real artist consider such a ridiculous picture an actual work of art? Roy wasn’t worried too much about the art critics and went on to create a Series of paintings on American Food.
Can you think of any foods that are typically American? A few suggestions: Hamburgers, French fries, peanut butter and jelly sandwiches, apple pie, fried chicken, and corn on the cob. Let the kids list these for you. The suggestions are just in case the class is stuck. Write a list of their suggestions on the board, if you are going to do the project on this page after your presentation.
Two of the paintings from Roy’s American Food Series were a hot dog and a cherry pie. Many people dislike this style of painting, but even if you do not prefer this style, this picture really makes you think and wonder. Don’t be quick to judge this painting. After you see more of Roy Lichtenstein’s art, you may begin to understand what he was trying to do and change your mind about it. Roy wanted to make people THINK about art, and LOOK, and then LOOK again. He wanted art to be fun and interesting, unusual and exciting! “My work is all about seeing,” Roy Lichtenstein said.
Project Ideas
- Draw a picture of food, or an object, which is uniquely American. (What about Nike shoes, Uncle Sam’s striped top hat, Microsoft computers, baseball, basketball, football, or Coca-Cola?) Have the object fill most of the space in the picture, the way Turkey does. Draw lightly with a pencil so you can erase. When the drawing is finished, paint it using only three colors, or just the primary colors, (plus white for optional TINTS) of tempera paint. When the painting is dry, create a thick OUTLINE, with black marking pen, around the subject of your picture.
- Create a Pop Art sculpture of an object or food that is uniquely American.
Haystack in Winter
By Claude Monet
Lichtenstein liked to copy famous paintings from art history and “modernize” them. He might update the furniture, replace objects, or paint using his exaggerated Benday process (making the dots large and easy to see). Roy did many replica paintings of well-known master artworks by famous artists such as Claude Monet, Vincent van Gogh and Henri Matisse.
Haystacks were a series of paintings that the famous Impressionist painter, Claude Monet created. Using different times of the day, and different seasons of the year, Monet made plain old haystacks in a wheat field look truly breathtaking. Monet would set up several canvases and move from one canvas to another, as the light changed, from one hour to the next. The next day, Monet would begin work on the first canvas at the exact same time as the previous day, and then move to the next, just as he had the day before. With this technique, Monet captured the changing effects of the light on the haystack throughout different hours of the day. By using bright, beautiful color, quick swipes of his wrist, and a true artist’s eye, Monet made a dull thing, like a haystack, seem exciting.
Monet painted in the Impressionist Style. If you look closely at one of his paintings, you will notice that he uses many small dabs of various colors. The Impressionists understood that the human eye naturally blends small dabs of color, placed side by side on a canvas. For instance, in a large area of blue an impressionist might also add dabs of lavender, pink or yellow. The human eye would not be aware of this from a distance because the eye would naturally blend the colors to create a single blue color. You would have to put your face close to the canvas in order to see the unexpected individual colors that actually made up the vivid and bright blue color.
Monet shades his painting using darker values of the primary or secondary colors. This is very different than artists before him. Other artists would use black or gray to add shade and shadows to their paintings. Monet noticed that shadows were just darker values of color and black or gray were not naturally found in a shaded area. Impressionist artists painted using bright color that tried to imitate the natural effects of sunlight. Monet never used black to create shadow in his paintings.
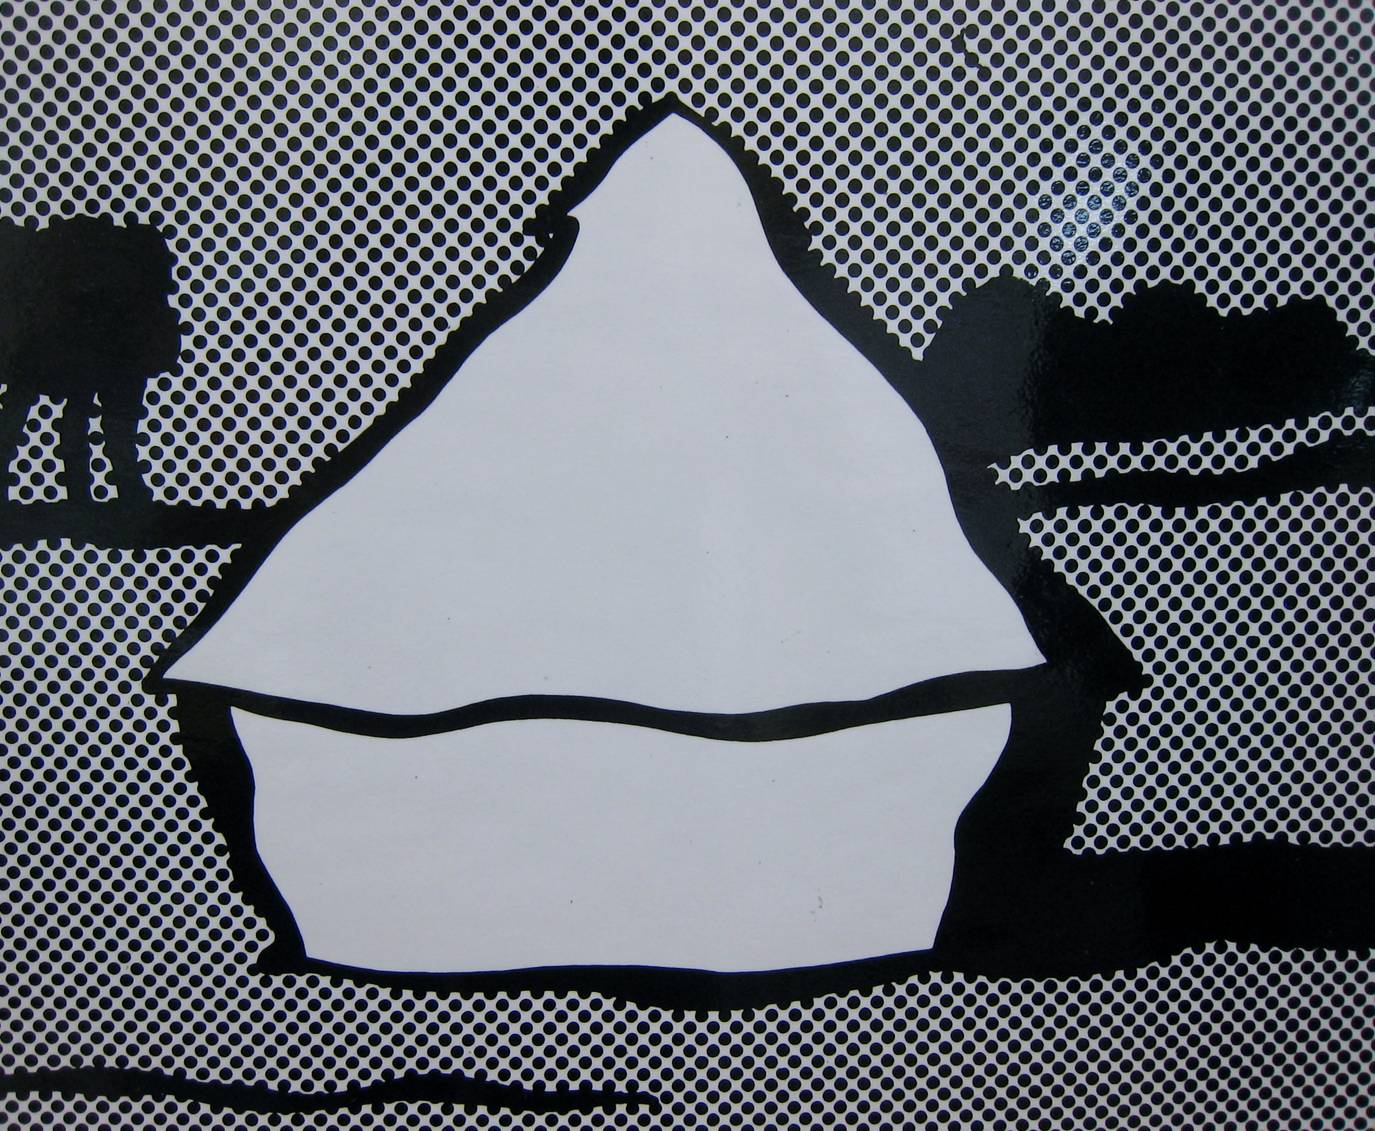
Haystack (black & white)
By Roy Lichtenstein
Lichtenstein borrowed Monet’s haystack idea to create this strange haystack landscape. His dot patterning makes this painting interesting. Instead of using an array of his typical bright, bold colors, Lichtenstein’s haystack painting is only a flat black and white. Roy really knew how to catch a person’s eye! Instead of paying attention to the very slight color changes in the haystack, the way Monet did, Lichtenstein TOOK OUT ALL THE COLOR and just used black and white. We recognize that the SHAPE of this picture is the same as Monet’s, but there is a very different effect.
Suggested Dialogue
What is the FOCAL POINT or CENTER OF INTEREST in these two paintings? The haystacks
When you look very closely at an Impressionist style of painting, you can see that small dabs of many colors fill in the different sections of the painting. Our eyes naturally blend these small blotches of COLOR and we see a solid section of single color.
The Benday dots of a comic book create a similar effect. Blue dots and yellow dots are printed near or over each other to create a third color—green. Our eyes also naturally blend the Benday dots, so that instead of seeing small, individual dots we see a solid color.
How did Roy Lichtenstein change the effect of shapes colored with Benday dots? He exaggerated the SIZE of the dots and spaced them too far apart for our eyes to blend them together.
What type of PATTERN can you see in this painting? The black Benday dots create a very neat and orderly alternating circle pattern.
Which area of the paintings is the POSITIVE SPACE and which area of the paintings is the NEGATIVE SPACE? The haystacks are the positive space and the background is the negative space. Lichtenstein added an interesting twist by leaving the POSITIVE SHAPE colorless. Usually, if any area of a picture is without color, it is the NEGATIVE space.
What season is it in these two pictures? In Lichtenstein’s picture, it is impossible to tell.
Project Ideas
- Create a very simple landscape scene on the dot template with lightly penciled lines. Outline the horizon line and color the shapes of the landscape (like small bushes, trees or a cast shadow) with a black marker or crayon. Color in each of the remaining dots of the landscape with black, leaving the rest of the page white. (Right handed people should begin coloring the shapes and dots from the upper left corner, progressing downward, to avoid smearing the black. Left-handers begin on the opposite side and go down.) Now, on a separate piece of white construction paper, outline a large SHAPE for the FOCAL POINT of the scene. A tree, bush, barn, house, rock, pond, or fence will work well for this shape. Trace the outline with black, leaving the shape white. Cut out the shape and glue it to the landscape. Mount the finished landscape on black, red, blue or yellow construction paper to frame. IN THIS PROJECT, THE NEGATIVE SPACE HAS THE COLOR (background) AND THE POSITIVE SPACE IS WHITE (haystack).
- Create a very simple landscape scene on large, white construction paper. Instead of using black, choose a red or blue marker, to outline the horizon line and color in any background shapes. Create a large SHAPE on the dot template (as in the above project). Outline the shape and color in the dots with the same colored marker you used for the background (red or blue). Glue the finished shape to the background. IN THIS PROJECT, THE POSITIVE SHAPE HAS THE COLOR (haystack) AND THE NEGATIVE SPACE IS WHITE (background).
Explosion No. 1
(Sculpture) Varnished Steel
Roy Lichtenstein enlarged and exaggerated Benday dots in many of his paintings and sculptures. Benday dots were considered his trademark.
Lichtenstein often painted action packed pictures of plane crashes with flaming explosions. This sculpture is a three-dimensional version of one of these explosions. Notice how he even included some of his trademark Benday dots using a steel sheet of perforated dots.
What two differences can you find between the dots Lichtenstein used in his paintings and the dots he used in this sculpture? The painting dots are two-dimensional and the sculpture dots are three-dimensional NEGATIVE SPACE, because the holes are cut into the steel sheet. The painting dots are POSITIVE SPACE, areas where they were painted on the canvas.
Project Idea
Use red, black, yellow and white construction paper (or poster board) to create a paper sculpture of an explosion, resembling this example. Cut alternating colored flame shapes and glue these on top of each other. Using two sided foam tape will give the sculpture added dimension. Use a hole punch to create small dots ahead of time. The class will need quite a few of these for creating a sheet of POSITIVE Benday dots somewhere on their sculpture. Separate the dots by color, into small sandwich bags and give everyone a small handful. Warn the kids to be careful with these dots, so they will have enough to glue somewhere on their sculpture! You may not be able to punch enough holes for everyone but it will save a lot of time if you punch a lot of them ahead of time. Bring in a hole punch or two so that kids can cut more if they are needed.
Whaam!
Oil on Canvas, two panels, 68” x 166”
(1963)
Roy Lichtenstein served in the military, from 1943-1945, during World War II. His army years took him to England, France, Belgium and Germany. This experience probably inspired his later comic-strip art of gung-ho pilots blasting their enemies from the sky. These paintings depicting comic strips about war and combat were Roy’s most dramatic and action packed works. Lichtenstein didn’t like war but he trained as a pilot when he served in the U.S. Army.
“A minor purpose of my war paintings is to put military aggressiveness in an absurd light…
Roy Lichtenstein
Roy didn’t want to encourage war with his paintings. He thought his silly pictures would get people to think twice about the negative aspects of war. He found it amusing that the world thought peace could be created with fighting. People being mean to each other usually creates more fighting.
Can you think of any other words besides “Whaam!” that might describe the sound of an explosion? A few suggestions to get the discussion started might be Pow!, Whack!, Boom!, Blam!, Blat! Kapow!, Biff!, Zip!, Zap!, Bop!, Whack!, Poof!
Look Mickey
Oil on canvas, 48” x 69”
(1961)
When Lichtenstein’s two sons, David and Mitchell, were very young children, Roy liked making drawings for them of Mickey Mouse and Donald Duck from their Bazooka Double Bubble Gum wrappers. One day he realized how important these cartoon characters were to his sons so Roy decided to paint a large gum wrapper comic onto a regular art canvas. “…it occurred to me to do one of these bubble gum wrappers, as is, large, just to see what it would look like. Now I think I started out more as an observer than as a painter, but, when I did one, about half way through the painting I got interested in it as a painting… I began to realize that this was a more powerful thing than I had thought and it had interest,” said Roy.
It was this painting, along with a few other comic strip paintings, that made Roy Lichtenstein famous practically overnight, when it was shown at a well-known Art Gallery in New York City. This large picture began Lichtenstein’s unique industrial style of printed comic book paintings.
Roy didn’t just copy comic strips, he transformed them into paintings with his use of pattern, composition and the enormous size of the paintings. Lichtenstein’s paintings make us rethink what art it.
“Our art teacher told us not to copy, and if you did…you’re a bad boy copying comics.” Roy Lichtenstein
Suggested Dialogue
What is happening in this painting? The painting illustrates an emotional Donald Duck hooking his own coattail and getting excited about hooking what he thinks is a big fish on his line. Mickey, who is always smarter than Donald, realizes what is happening and is hiding his laughter with his gloved hand.
How many COLORS are in this painting? The three primary colors—red, yellow, and blue
Can you find the Benday dots in this painting? Roy’s trademark Benday dots show up in Donald’s eyes and Mickey’s face.
Project Ideas
- Find a comic strip that you like from a newspaper or comic book. Choose one panel from the comic strip that you would like to create a painting of. Try to find one with a dialogue bubble. Select the details of the comic strip panel that you want to include in your painting and which details you will leave out. Change anything you like—the colors, characters or even the dialogue. By changing things in the panel you will make the painting your own and not a “copy” of the original. Enlarge the comic panel on a sheet of white construction paper. Paint with tempera paint and outline with black marker, once the paint has dried.
- Create your own Funny Pages Comic story on the handout page. You could also illustrate a joke for your comic story. Practice creating the comic characters in different poses, on a separate sheet of paper, to use as a reference as you draw your comic story in the panels.
- Fold paper into four sections and draw various expressions on comic character portraits—smiling, laughing, crying, and angry.
- Draw comic characters in various poses—walking, sitting, running, jumping, falling.
- Have everyone create their own version of a Mickey Mouse or Donald Duck painting.
Washing Machine
Oil on canvas, 56” x 68”
(1961)
Roy Lichtenstein often found inspiration for his paintings in advertising illustrations, catalogues, in newspapers and the yellow pages. He would also paint simple things that people might do around the house, like wiping a refrigerator with a cloth, spraying an aerosol can, or putting soap in a washing machine full of laundry.
Lichtenstein didn’t realize it yet, but other artists in the United States were also using American advertisements as the subject of their art, at about the same time. Roy used to say, “I’m creating my own work in my own style.”
While he was teaching at the University in New Jersey, Roy met many artists and teachers in the art department who were talking about and making new kinds of art. These artists were also using images and objects from everyday American life that had never been considered “art” before. Some of them were also performing short plays and skits for their art called “Happenings.”
(See Packet 6. Modern Sculpture and read about Claes Oldenburg—Two Cheeseburgers with Everything—to learn more about “Happenings”.)
Eventually, Roy Lichtenstein’s style of art became grouped with other artists who had the same philosophy about art and whose work is now known as “Pop Art”.
Suggested Dialogue
How many colors are in this painting? Only yellow because black and white are not colors
Are there any Benday dots in this painting? On the detergent box and in the background
Can you see curved LINE? Inside the washing machine the water has curved line
Are there any other kinds of LINE?
Project Idea
- Cut out enough yellow pages from an old telephone book to give a page to each student. Be sure to choose pages with a lot of graphic advertising on both sides. Give everyone a piece of white paper and have copies of the dot template available. Have the class choose a single, simple picture from either side of their yellow page. Instruct the class that they will need to organize and plan a painting of this advertisement or a section of the advertisement. Tell them to look carefully and decide what they want to have in their painting and how they will paint it. Just like an ad, kids will need to include only the essential and important details!
Now, using a pencil, draw a larger version of the picture, filling most of the paper. Every picture should be different because everyone has a different yellow page from the phone book. When the picture is finished, go over the outlines with a black marker or heavy black crayon. Using only a primary color of tempera (or all three primary colors), paint just two or three areas of the picture with solid, bright color. If anyone wishes to incorporate Benday dots into their artwork, place the dot template over the particular area of the picture and trace the shape of that area lightly with a pencil. Cut the shape out, then color the dots (and partial dots) of the shape and glue the shape to the picture.
Create a comic story using simple pictures and dialogue. Even stick figures will work. Try using a goofy joke you already know.
if you get stuck without an idea, REMEMBER TO INCLUDE: setting, backgrounds, characters and dialogue. Check Sunday Comics or Bazooka comics for ideas—but don’t copy! Change the dialogue, the story, the setting or the characters. Create a simple, yet original, comic of your very own!
Begin by printing your first and last name, at the top of the comic panel page, next to “Created By”. Study the lettering in other comics. Lettering is also an important part of comic artwork!
If your character is TALKING, use a “BALLOON”:
Use a thought cloud if your character is THINKING:
Be sure to point the dialogue balloons and
the thought clouds towards the character
that is speaking or thinking. Allow enough room
to write. This might take some practice, so it’s a
great idea to trace a few EXTRA COPIES of the comic
panels. You may also do this to add an extra page, in
case you need more panels to tell your story.
When the drawings are finished, outline everthing with black marker and color.
The Funny Page
Created By
“I’m creating my own work in my own style.”
—Roy Lichtenstein