1.
 Other Sculpture Examples:
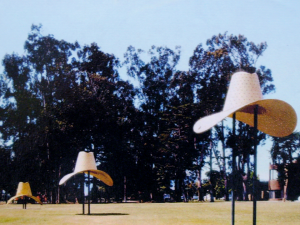
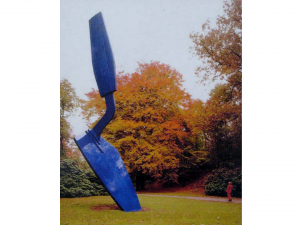
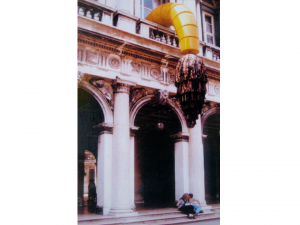
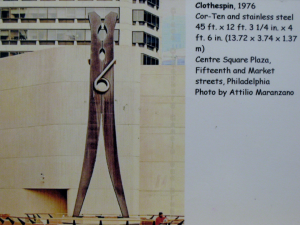
In many ways, modern sculpture defies formal definitions of traditional sculpture—SUNKEN RELIEF, LOW (bas) RELIEF, HIGH RELIEF, FULL-ROUND and the need for being realistically lifelike. Modern sculpture can be assembled using scraps of recycled materials, or a mass of abstract, geometric FORMS. Modern sculpture can float in the wind, or it can resemble everyday objects. Modern Sculpture can be carved, cast, modeled, created with fabric, vinyl, plaster, Styrofoam, or just about anything else a future sculptor has not yet considered.
The major focus of this packet is FORM. Although the sculptures in this packet are represented by photographs (which have two-dimensional SHAPE), it would be too inconvenient and costly to send real three-dimensional sculpture (FORM) to every school. So, for the sake of discussions, these photographs represent three-dimensional FORM. Discuss the difference between three-dimensional FORM and two-dimensional SHAPE. Consider a project using SHAPE instead of FORM.
Three of these FORMS are FULL-ROUND SCULPTURE (Two Cheeseburgers, Baboon and Young, Fiston la Filoche) and one FORM is an example of a HIGH RELIEF (attached to a background) ASSEMBLAGE SCULPTURE (Sky Cathedral: Southern Mountain).
Sky Cathedral: Southern Mountain is filled with FORM that creates LINE. Most of this LINE is vertical but there is also horizontal LINE. Have the class look for these vertical and horizontal LINES in the sculpture (especially grades 1-2).
The bright COLOR painted on two of these sculptures suggests that this packet would work well with a Color Wheel project (grades 2-5).
If you create sculptures with clay, make sure that you emphasize LINE for creating details and TEXTURE with third and fourth graders.
Be sure ALL 4 pictures are returned to the Packet Carrier after you Presentation is finished.
Modern Sculpture Glossary
Abstract: A style of art in which LINES, SHAPES, COLORS, PATTERNS and TEXTURES are simplified or exaggerated. Geometric shapes and a lack of detail are often features of abstract art. Art that doesn’t look realistic yet might represent something real. Example—a green circle with a thin brown rectangle may not look like a real tree, yet most people can tell that it represents a tree if seen in a drawing.
Assemblage: A piece of three-dimensional art made by combining a collection of unrelated materials into a new creation. An assemblage can be a free-standing sculpture, a piece mounted on a panel, or even a type of three-dimensional collage. Did you ever play with toys that had removable pieces you could switch around to make a different toy? When you did this kind of recombining of parts, you were doing something that many artists do. Artists use their imaginations to see how different things (especially weird things like cans, wires, plastic bottles, wire sieves, spoons, springs, hubcaps, steering wheels, horseshoes) can be put together to form new artistic creations. This kind of art sculpture is called an ASSEMBLAGE.
Façade: The front of a building, usually decorated.
Form: The three-dimensional structure of an object. In two dimensions, a FORM is represented as a SHAPE.
Free-Form: having an irregular or non-geometric SHAPE. A free-form SHAPE is made of curving or angled irregular LINES.
Found object: A natural or manufactured object whose SHAPE, TEXTURE and/or COLOR is appealing to an artist.
Monochrome: A painting, or drawing, or piece of sculpture painted in all one color, or in different shades of a single color.
Non-representational: Abstract, does not represent a natural or identifiable object.
Three-dimensional FORM: Can be measured in three ways—height, width and thickness. Sculpture has FORM.
Two-dimensional SHAPE: Flat, can be measured in only two ways—height and width. Paintings and drawings have SHAPE.
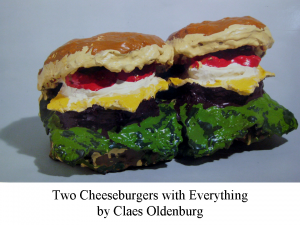
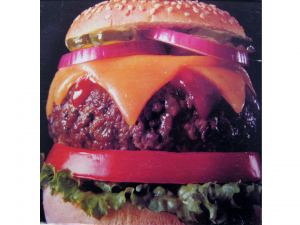
Two Cheeseburgers, with Everything
By Claes Oldenburg
(1962)
About the Artist
Claes (pronounced Clace) Oldenburg was born in Sweden, in 1929, into an educated and cultured family. He moved to Chicago with his family, in 1936, when he was a young boy. Claes was educated at Yale University, where he studied literature and art. In 1950, Oldenburg returned to Chicago and worked as a newspaper reporter. This was his first job. While a reporter, he attended classes at the Art Institute of Chicago.
In 1956, Oldenburg moved to New York City’s Lower East Side. He and other artists there began to reject the idea that art was meant for only the people who had enough education and money to afford it. These artists thought that art should be part of everybody’s everyday life. They also felt that Americans valued whatever was popular at the time and whatever they could buy and sell to make a profit. In general, these artists felt that America was more concerned with profit and financial success than fine art. These artists created a new type of art called “Pop Art”. This art used forms and ideas that were easily recognized by everyone—soup cans, comic books and everyday objects were just a few of their inspirations. Pop art showed how Americans were becoming artistically unemotional with their mass-produced world. Pop artists created artwork that looked like it could have been mass-produced (many made exactly the same) in a factory, instead of something uniquely original and one of a kind. At first, this was an artistic criticism of American society but eventually it became an exciting and fun type of new art.
About the Art
In the early 1960’s, Oldenburg became fascinated with everyday objects that he turned into large-scale Pop Art sculptures. These sculptures included bathroom fixtures, typewriters, car parts and foods. Many of these were gigantic “soft sculptures”, created with stuffed canvas and vinyl. These sculptures had no real practical use and insulted many people’s good taste, yet they were fun, interesting and they made people think.
During 1961 and 1962, Claes Oldenburg created a placed called “The Store”, in a Lower East Side New York neighborhood, where many artists and musicians liked to gather. It was an Art Gallery from which he sold his sculptures. The Store looked like an actual storefront and the artwork Oldenburg sold there were sculptured objects such as food, shoes, and clothing, made from plaster and paper mâche. At the time of The Store, Oldenburg created Two Cheeseburgers, with Everything.
This sculpture is made from burlap and plaster and it is painted with bright enamel paint. The sculpture is only about 7” x 15” x 9”, about the same size as this photograph of it. The artist hasn’t tried to make these cheeseburgers look real at all. That is part of the fun of Pop art. This shiny paint gives the food a synthetic, artificial TEXTURE and COLOR. Two cheeseburgers is a perfect Pop art subject. A cheeseburger is a modern food created in America that people all over the world can easily recognize. It seems like a ridicules subject to create as an artistic sculpture but it is fun to look at and makes people think—“Hey, I could make something like that!”
Oldenburg used his imagination to create an element of shock or humor to transform these cheeseburgers into something artificial. Even if they think this sculpture isn’t “real art”, most people like this fun and silly piece of art.
Suggested Dialogue
Can you tell what the “everything” is that these cheeseburgers have on them? The artist does not use detail to let us know what is between these hamburger buns. He has mostly used COLOR with very rough SHAPE.
Do these cheeseburgers make you feel hungry or do they ruin your appetite? Would they make a gigantic mess if you tried to eat them? Do the cheeseburgers look real? The artist made the cheeseburgers shiny on purpose, so they look artificial and plastic. Does this sculpture make you laugh? What other subject can you think of for a Pop Art sculpture?
Project Ideas
- Paper mâche cheeseburger sculpture: The only consideration for a project like this is that it will take at least TWO class periods to finish—one to create the form and one to paint it, with drying time between. Be sure to discuss this idea with the teacher to make sure that extra class time can be scheduled to finish the project. The Art Discovery volunteer also needs to be sure they will be able to oversee the project with the class through both sessions. Not recommended for younger grades.
To make a rounded bun, cut two corrugated cardboard circles—one for each half of the bun. Cut two newspaper circles about 2” larger than the first circles. Attach the newspaper circle to the cardboard circle, using small pieces of masking tape at the edges; stuff with crushed newspaper to form two halves of a hamburger bun. Cover this with two layers of newspaper strips, soaked in water with wheat paste or flour. Make sure the strips of paper are not too wet by wiping them through your fingers before laying them on the form. Cover another circle and a square of corrugated cardboard (meat and cheese) with two layers of newspaper strips also. Allow 24-48 hours to dry, depending on how thick the layers are. The dry paper mâche can be painted with tempera or acrylic paint. The acrylic will not flake off as easily as the tempera will, once it is dry, but acrylic will not wash out of clothing. Spray with clear gloss to make a shiny cheeseburger, like Claes Oldenburg.
- Younger children could create a flat cheeseburger with construction paper shapes. Draw two round circles on a sheet of tan paper, which kids cut out for a bun. A brown circle can be the burger, an orange square for cheese, red freeform shape for ketchup or red circles for tomatoes. A large leafy green shape could be torn or cut for lettuce, two smaller circles of a different shade of green could be pickles, and a white circle with the center cut out could be an onion. These can be assembled and glued to a paper plate, using thicker two-sided foam tape, to keep each shape somewhat separate and give the burger more fullness. Small squares of corrugated cardboard, glued between each cheeseburger part, would also work for this. To make a thicker bun, use corrugated cardboard circles. Cut sesame seeds from yellow paper to create a deluxe bun. Kids could even cut out French fries to put on the plate with their cheeseburger.
- Colored play dough (tan, brown, green, red, orange and maybe yellow or white) can be sculptured to create a layered cheeseburger. The sculptures don’t need to be very large. (Have you ever seen those gummy hamburgers and hotdogs?)
- A very simple, yet thicker, paper bun can be made by stuffing two circles of colored Kraft paper that have been glued, stapled or taped together. The top circle of each pair should be slightly larger than the bottom circle, so that the bun is slightly domed after it has been stuffed (with crumpled paper). Create a set of these and cut the inside parts of the cheeseburger from construction paper. A stuffed hamburger patty will give even more dimension to the sculpture. Ketchup or mustard can be painted on. The stuffed parts of this sculpture must be made with lighter weight Kraft paper. You could even make the entire cheeseburger from thinner white paper, glued and stuffed, and the separate pieces could be painted before gluing the sculpture together.
- A cheeseburger could be created using foam circles for the burn and the other parts could be cut from felt.
- Concentrate on the layers, or bands, of COLOR that are seen in a side view of a cheeseburger and paint it on paper. Pay attention to how thick each layer (bun, patty, cheese, lettuce, tomato, pickle, onion?) would be painted. For instance, the bun and the meat patty would be thicker strips of color than the thinner layer of cheese.
- A side view of a cheeseburger (see above suggestion) can be cut from construction paper and glued to a paper background.
- Gather and bring in enough round, cheeseburger shaped rocks for each student to paint their own cheeseburger sculpture to take home. Be sure to scrub the rocks so that they are clean enough for the acrylic paint to stick well. Paint a base coat of white over the entire rock first. Using the line pattern idea shown here, divide the rock into a wide band through the center (meat), with four triangles (cheese) on four sides of the rock. Paint the center band dark brown. Paint the bun tan. Paint ivory colored sesame seeds on the top of the bun. Be sure that the top bun is a little thicker than the bottom (just like a real cheeseburger).
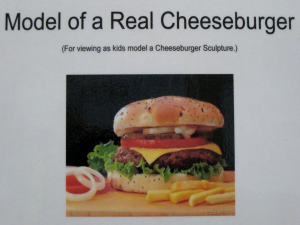
Model of a Real Cheeseburger
(For viewing as kids model a Cheeseburger Sculpture.)
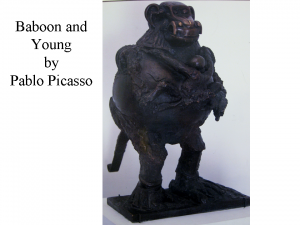
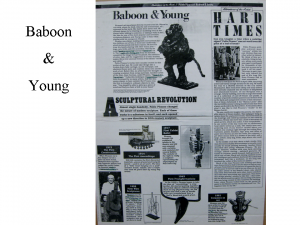
Baboon and Young
By Pablo Picasso
(21” high)
(1951)
About the Artist*
*For further information on Pablo Picasso see Packet 7. Portraits in Pink and Blue.
In the first decade of the 1900’s, Pablo Picasso began to experiment with sculpture. Picasso could never follow the accepted rules of painting, which he had learned in art school. It was the same way with sculpture. He was always inventing his own rules and coming up with new ideas for creating art. Picasso found a way to make exciting, unique sculptural creations using objects from everyday life that most people would never have imagined could be used in a work of art—like bowls, jugs, handles and toys!
During the early 1950’s, when Picasso was in his seventies, he was surrounded by his two young children, Paloma and Claude. Picasso spent much of this time painting his children and their mother. He also spent time experimenting with ceramic artistic creations. Yet, even while he was busy with his young children, painting and ceramics, Picasso found time to come up with a NEW outlet for his creative expression—sculpture. These sculptures were partly ASSEMBLAGES. An assemblage is a three-dimensional sculpture built up from a series of objects that Picasso found in his home or studio. He also combined these assemblages with plaster, which he molded between the different objects to hold them together and build them into one complete image.
When this sculpture was completed, Picasso had it cast in bronze. Bronze is a metal made from copper, mixed with tin. Many public sculptures, found in parks or in front of public buildings, are often cast in bronze. To create a bronze sculpture, a mold is created from the finished sculpture. Melted bronze is poured into the mold at a FOUNDRY (a business for producing castings in molten metal). When the metal cools, it is taken out of the mold and a metal sculpture, looking just like the original, is produced. By casting these assemblages in bronze, Picasso made it easy for us to think that bowls were always meant to be seen as large baboon bellies. The solid bronze makes the bowl shape look more natural, as if all baboon bellies were created this way.
The head of the baboon mother is made from two toy cars. Can you find them?
The top car is placed so that the roof is seen as the head and the grill, at the front of the car, as the upper part of the face. The second car, placed upside down, looks like a heavy lower lip and seems to convince us that this is really the face of a Baboon, instead of two toy cars.
Picasso made the ears out of two metal handles. The round body was created from a large, jug type bowl. There were handles on either side of the top of the jug, which the artist turned into the baboon’s shoulders. The Baboon’s tail is a metal rod, bent up at the end.
The young baboon was modeled on the surface of the bowl, practically built up, using plaster. By transforming his original statue into bronze, Picasso has made the baby baboon look like a real creature too. The bronze, with its rich surface finish, doesn’t have a uniform TEXTURE. Matte and shiny sections alternate all over the piece to create rougher and smoother TEXTURES. This makes us think of patches on a baboon’s body where the fur has been worn away.
Suggested Dialogue
Does this unusual sculpture make you wonder whether Paloma and Claude, Picasso’s children, ever knew where their toy cars had disappeared to?
When you first saw this statue, did you notice the baboon’s head looked a lot like a car?
Does it surprise you how well this artist made these toy cars look just like a baboon’s face?
This poster of the sculpture is almost life size. (The picture measures 19”; the original statue is 21”.) Use a yardstick to show the kids how tall this statue is in real life.
If you owned a statue like this, where would you display it? In your garden…your living room… outside… inside… In a tree?
Project Ideas
- Sculpt clay monkeys or baboons. Display photographs of real monkeys, gorillas and baboons to give the class ideas on how to form their sculptures.
- Create a sculpture of a human mother and child.
- Draw or paint a picture of a mother baboon and her baby.
- Make a picture or sculpt an entire baboon family.
- Choose another animal mother to draw or paint with its baby.
- Create a picture of a human mother, or a monkey mother, and child with cut construction paper SHAPES glued to a (house, jungle) background.
- Create a picture of a monkey with construction paper and fake fur.
- Create a paper mâche monkey sculpture using a large balloon for the belly, a smaller one for the head, and rolled newspaper armatures for the arms and legs. When it is dry, the monkey can be painted or trimmed with brown tissue paper fur, just like a piñata. Remember—this project will take more than one class time to finish and is not recommended for younger grades. Check with the teacher ahead of time.
- Make a simple monkey doll. Draw a simple outline of a monkey on two pieces of brown felt (Check coloring books or clip art for a good pattern). Have 3-5 graders sew the two pieces of felt together and stuff with a small amount of batting. Use tan felt for ear and face shapes. Glue felt to felt with TACKY GLUE ONLY, regular white glue will not stay. Add wiggle eyes. A piece of brown yarn could be sewn on for a tail. Many older boys will actually think this sewing project is fun! (But some won’t so you need to evaluate your own class personalities or ask the teacher.)
- Make a monkey puppet from an old brown sock. You could dye a bunch of old socks brown. Button eyes can be sewn on or felt eyes glued on (with TACKY glue). Add a brown pipe cleaner tail. Felt arms could hold a baby made from brown pom poms and pipe cleaners.
- Make sock monkey dolls. Check craft and fabric stores for pattern or kits. This would be a more costly project.
- Bring in several “Curious George” storybooks. Have the class use these simple monkey pictures as a model for creating monkey sculptures or pictures. Curious George will be more kid friendly for K-2 classes to use as a pattern.
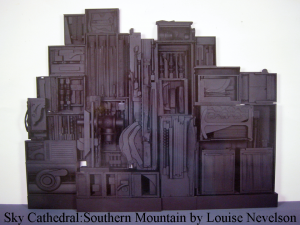
Sky Cathedral: Southern Mountain
By Louise Nevelson
(1959)
About the Artist
Louise Nevelson was born in Kiev, Russia, in 1899. In 1905, she immigrated with her family to the United States. Louise lived in Rockland, Maine. When she was six years old Louise had to learn a new language and start school in a strange new environment. Because she was in a new country, Louise always felt out of place at school. Art became an escape from things that made her feel uncomfortable. Louise always felt better when she was creating with watercolors or crayons!
Louise studied briefly in Munich with the German-born American painter, Hans Hofmann, but spent most of her life in New York. She had a way of attracting interesting people and many famous artists, writers and musicians became her lifelong friends. Louise Nevelson loved to do untraditional things and some of the things she liked were surprising. She was very daring and dramatic in her style of dress and wore unusual hats, long, black mink eyelashes and even smoked long, thin cigars. By the 1940’s, Nevelson was working with ASSEMBLAGES—three-dimensional constructions (sculptures) made from everyday objects. The assemblages were huge and made of wooden boxes stacked on top of each other. Assemblage Sculpture like hers had never been seen before in the art world. This is not surprising, since Louise always liked being different.
During the period after the Second World War, many American sculptors, including Louise Nevelson, were questioning the use of traditional materials and forms in sculpture. In general, these sculptors wanted to widen the scope of modern sculpture by reducing it to its minimal physical elements—geometric forms. By the 1960’s, most Minimal Sculpture was completely ABSTRACT. Minimal Sculpture consisted of the basic formal art elements of COLOR, TEXTURE, FORM and SPACE—the bare basics.
About the Art
Later in her life, in the 1950’s and 60’s Louise developed her own distinctive style of Minimalist sculpture. Typically, Nevelson used everyday materials or found objects to construct large monochromatic, non-representational, wall-dependant sculptures. Sky Cathedral: Southern Mountain is an example of this typical style.
The assorted pieces Louise Nevelson used in this sculpture are all unified by using just one color, which makes all the pieces seem as if they belong together. We have to look closely to be able to identify the individual objects found within this piece of sculpture. The uniform black paint separates the individual elements from their original purpose of creation. All the parts seem as if they were always supposed to fit together.
This piece of sculpture could resemble the elaborate facade of a Gothic Cathedral. A Cathedral is a large church. Its spires usually draw the viewer’s eyes upward. Like a cathedral, this sculpture begins with the larger shapes on the bottom, gradually getting smaller as the shapes move toward the top. The large, dark sculpture could also represent a mountain silhouette. It is taller than 10 feet.
The sculpture is non-representational. That means the artist didn’t try to make it look like anything real, it is abstract. The name of the sculpture is the only clue we have as to what it might be. The artist intended the sculpture to lean against, hang or be attached to a wall. When you look closely you can identify many of the various pieces that are combined to make the solid whole. Yet, some things are harder to identify. This is probably because there is no individual color on these items, so they all blend together.
Suggested Dialogue
Why do you think Louise Nevelson made this sculpture so large? A smaller wall sculpture would not have as much power. When a person stands in front of a sculpture this size it seems mysterious, strange and important.
What kinds of objects did the artist use to create this sculpture? Some of the items are wooden crates, wood turned posts, wooden furniture legs and assorted wooden slats or pieces of metal.
Spend time viewing this sculpture before your presentation. It will help you point things out to the class. It takes a little time to notice all the different parts of this sculpture.
Which geometric shape is repeated the most often? The object-filled boxes are rectangles. Notice that the entire sculpture has been created by assembling many wooden boxes filled with unusual shapes. Louise thought of each box that went into her large constructions as an individual piece of art. It is also interesting to note that her father owned a lumberyard.
How many boxes can you see? (I’m not going to count them.)
Can you find any arcs or circles? Check the three boxes in the lowest left corner and two boxes near upper right corner. These are the most obvious places but there are still more.
Should any of these shapes remind us of things in the real world? There seem to be some recognizable objects, like furniture legs, turned posts and handles. Most are mysterious “found objects”. Many of these objects lose their familiarity when viewed this way. Using one color unifies all the separate parts and makes them become one whole. The entire sculpture becomes an assemblage of abstract shapes that don’t refer to any particular place or object. This was the artist’s intention.
Why do you think the artist chose to paint her sculpture black?
Black was a color that Louise Nevelson loved. She once had her entire apartment painted black because she felt that black created the most comfortable environment for her.
If you could rename this sculpture what would YOU call it?
Project Idea
- Grocery stores often cut the sides of boxes down to only a few inches for displaying cans. Shoe boxes and shirt boxes would also work well for this project. Shallow boxes make a good base for a “found objects” sculpture. Send a list home with kids the week before, to get help collecting objects for the sculpture. Items to put on the list include: sticks, twigs, broken toy parts, tissue or towel tubes, jar lids, milk cartons, small broken furniture pieces, beans, dried pasta (there are quite a variety of shapes), broken handles, scraps of wood, recycled meat trays, candy boxes, etc. Request that these things be clean and the labels removed. Be sure that parents understand that these objects will not be returned. They will be painted and become a permanent part of somebody’s sculpture. Request that no glass or objects with sharp edges be sent.
Instruct the class to use enough objects when building the sculpture to fill their box tray. Arrange and rearrange the objects two or three times before attaching them to the box. This way kids can BALANCE the box. Does the box appear heavier on one side than the other? Discuss BALANCE before the project begins.
Wire can be used for anything too heavy to glue or tape (with masking tape) to the box background. Paint the finished sculpture with tempera (in one color) and a wide foam paintbrush. Mixing a little white glue with the paint will help it stick better to shiny or paint-resistant surfaces. The paint will hide the tape.
An option for this project would be to wire the individual boxes together and create a large sculpture display in the classroom.
- Find a contractor or some dads who will donate pieces of scrap lumber to glue into sculptural FORMS. Paint these with just one color (monochromatic) when the glue is dry. Use wood glue.
Fiston la Filoche
(Fis-tone lah Fee-low-sh)
By Jean Dubuffet
(60 ½” x 24” x 14 ½”)
About the Artist
*See Packet 2. I Never Saw a Purple Cow for more detailed information on Jean Dubuffet.
Jean Dubuffet was born in Le Havre, France, in 1901. In 1918, Jean studied art for a few months in Paris, where he became friends with many artists and poets. Starting in 1924, he alternately gave up painting for awhile and then returned to his art, all the time managing the wine business which he had inherited from his father. In 1942, Dubuffet decided to devote himself completely to art once again.
About the Art
Dubuffet is considered one of the most stimulating artists among the modern masters. He was highly influenced by children’s drawings. In the “art brut” (raw art), as he called it, Dubuffet did not pay attention to the “rules” the art schools taught. Dubuffet started using a thick paint, combined with glue, charcoal, sand, glass and other materials to create an uneven textured surface. He often never planned what he was going to create, or how it was going to look, he would just let it happen.
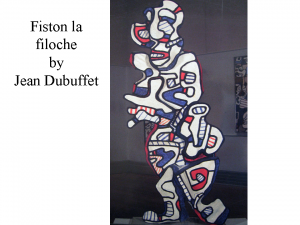
During the early 1960’s, Dubuffet did a series of drawings of interlocking human shapes, outlined in black. These decorative works of art were created with magic markers. They were lively looking and seemed like large pieces of jigsaw puzzles. In 1966, Jean started to experiment with carving similar interlocking FORMS and figures from a block of Styrofoam. Fiston la filoche is one of Dubuffet’s very first experiments with this Styrofoam and magic marker technique.
Suggested Dialogue
What do you see when you look at this sculpture? Red and blue color outlined in black
What do you think the artist used to create this sculpture? Styrofoam and paint
Point out the painting on the wall in the background of the picture. Ask the kids: Do you notice any similarities between the painting on the wall and the sculpture? How are they the same? They are decorated with the same COLOR, LINE and free-form SHAPE.
How are the painting and the sculpture different? The painting has only two-dimensions—height and width. The sculpture has three-dimensions—height, width and thickness.
List some examples of geometric SHAPE? Circle, square, rectangle, triangle, oval, diamond, octagon, etc.
What types of SHAPES decorate this FORM (sculpture)? Free-form shapes and geometric shape. There could also be organic shape because it appears that some of the shapes create a face at the top of the sculpture (but that depends on how you interpret the sculpture).
Project Idea
- Sheets of Styrofoam can be obtained from building supply stores. Styrofoam peanuts would also make interesting FORMS that can be decorated with black, red and blue marker outlines and SHAPES. If you use a solid sheet of Styrofoam, you should cut out FORMS ahead of time. Cut many random FORMS that are similar to puzzle pieces. If you use thicker chunks of foam, found in boxes around televisions or computers, kids could “carve” these with plastic knives. Add a little liquid dish soap to tempera paint for painting the Styrofoam if you choose not to use permanent markers.
- Spray paint jigsaw puzzle pieces white. Let the class decorate these FORMS with “sharpie” markers in red, blue and black. Glue the pieces together on a background cardboard piece (with white glue) to create a RELIEF SCULPTURE of an alien being. If you paint both sides of the puzzle pieces, kids could stack (after decorating with colored marker SHAPES and LINES) and glue them, to create a full round sculpture FORM.

